Hello, everyone! I’m O, a staff member on the second floor of our main store.
Let me ask you a question! Can you sew in a zipper?
These days, zippers are sometimes used as a decorative feature on clothing to stand out.
Maybe you’ve thought, “I’d love to make something like that!” You got all the materials ready, but then found yourself thinking, “This is so hard! I don’t know how!” or “It’s my first time, so I’m not confident…” Have you ever given up on making your project because of that?
In this article, we’ll show you how to sew in a zipper—a technique that many people think is difficult and try to avoid!
Some of you may already know how to do it. But if you’ve tried before and thought, “I never want to do this again!” because it didn’t go well, don’t worry!
After reading this article, we’re sure you’ll be thinking, “I can do this too!” ♪
目次
- Anyone Can Sew in a Zipper!
- Get Everything You Need Before You Start
- Helpful Tools for Sewing Zippers
- How to Sew a Zipper with a Sewing Machine: The Basic Method
- Advanced Tip #1: Sewing a Zipper onto a Curved Edge
- Advanced Tip #2: Sewing with Folded Zipper Ends
- Troubleshooting Corner: Your Questions Answered!
- Sew Zippers with Confidence!
Anyone Can Sew in a Zipper!
About Zippers
Zipper Parts and How They Work

A zipper is mainly made up of three parts: the Tape, Elements, and Slider.
- Tape: The fabric part of the zipper that is sewn onto a garment, pouch, or other project.
- Elements: The interlocking teeth of the zipper. The zipper opens and closes as the Elements mesh together.
- Slider: The part you move to open and close the zipper. It plays an important role by bringing the teeth together or separating them.
How to Measure Zipper Length and Size
Measure the zipper length with the zipper closed, from the top stop to the bottom stop.
The zipper size is determined by the size of the Elements. The larger the number, the wider the Elements are.
The zipper size is often marked on the back of the slider, so be sure to check it!
Types of Zippers
Metal Zipper
![3G-SP8MIX 玉付きファスナー [ゴールド] スプリングカラー 8色セット](https://www.nippon-chuko.co.jp/nck-common/wp-content/uploads/2024/06/0417162854_661f7a36712d2.jpg)
This type of zipper has metal Elements.
The Elements may be made from materials such as aluminum, brass, or nickel silver.
Vislon® Zipper
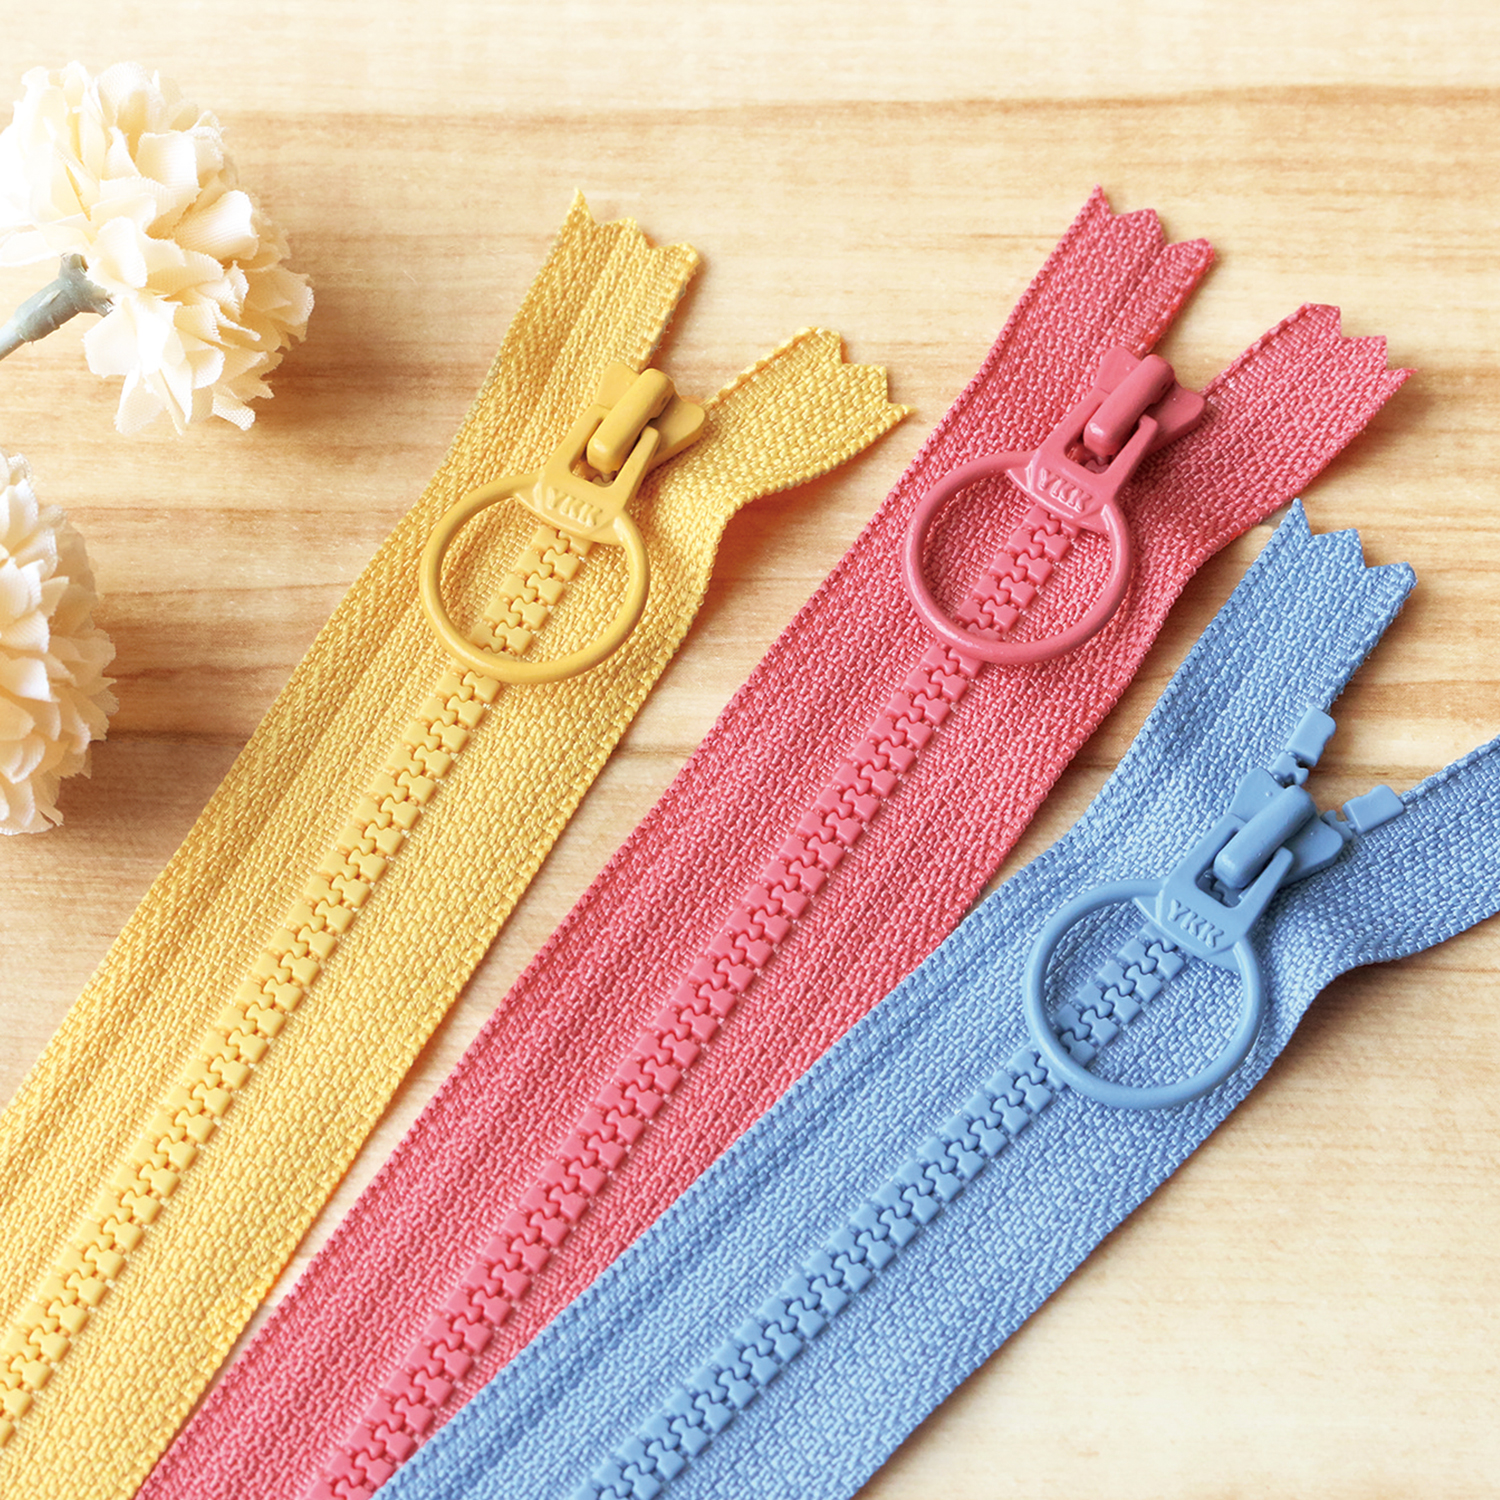
This type of zipper has plastic Elements, making it lighter than a metal zipper.
Because of the material, the Elements are less flexible and do not bend easily. It is best to avoid using this type for tight curves or lightweight fabrics.
Two-Way (Symmetrical) Zipper
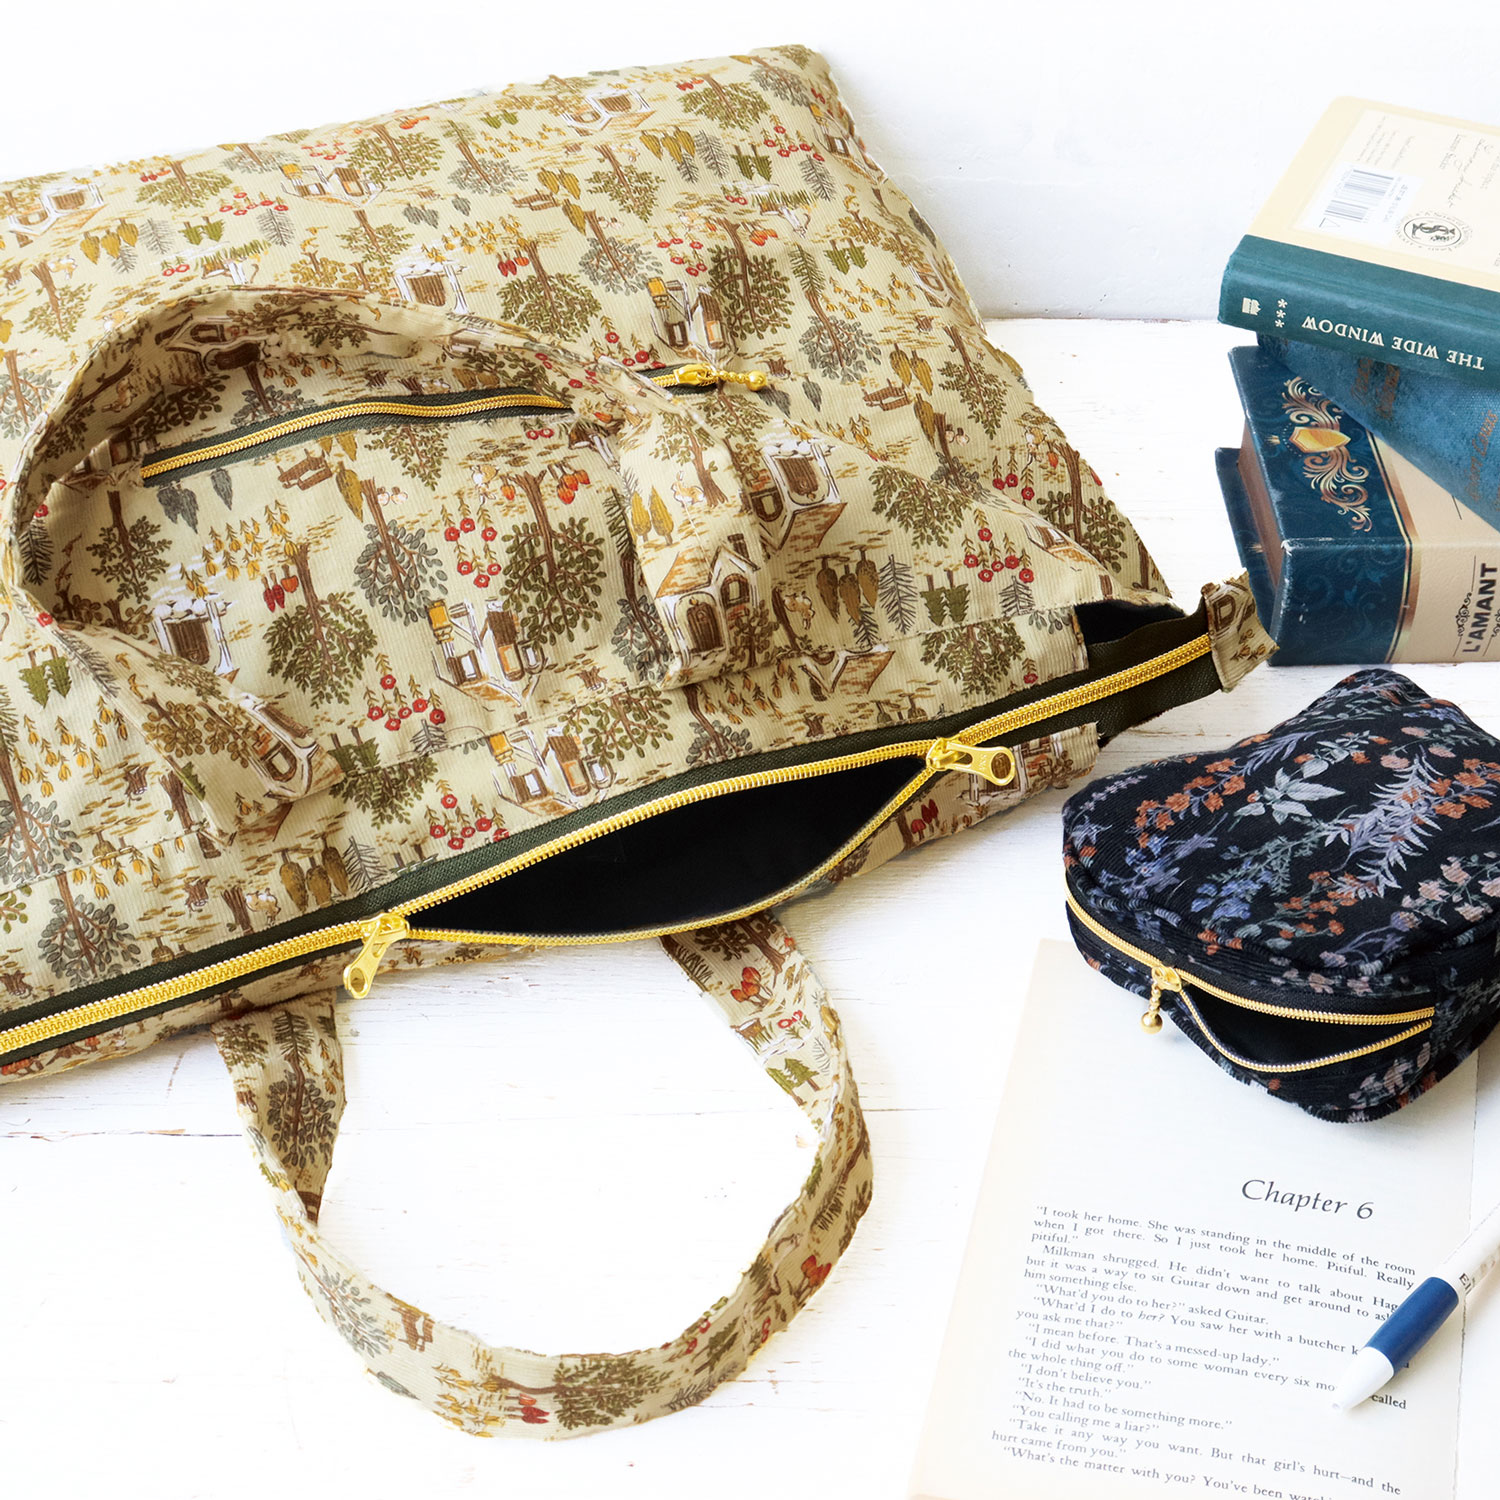
This zipper has two sliders.
Because it has two sliders, it can be opened from both sides. It is a great choice for larger bags, pouches, and similar projects.
Coil Zipper
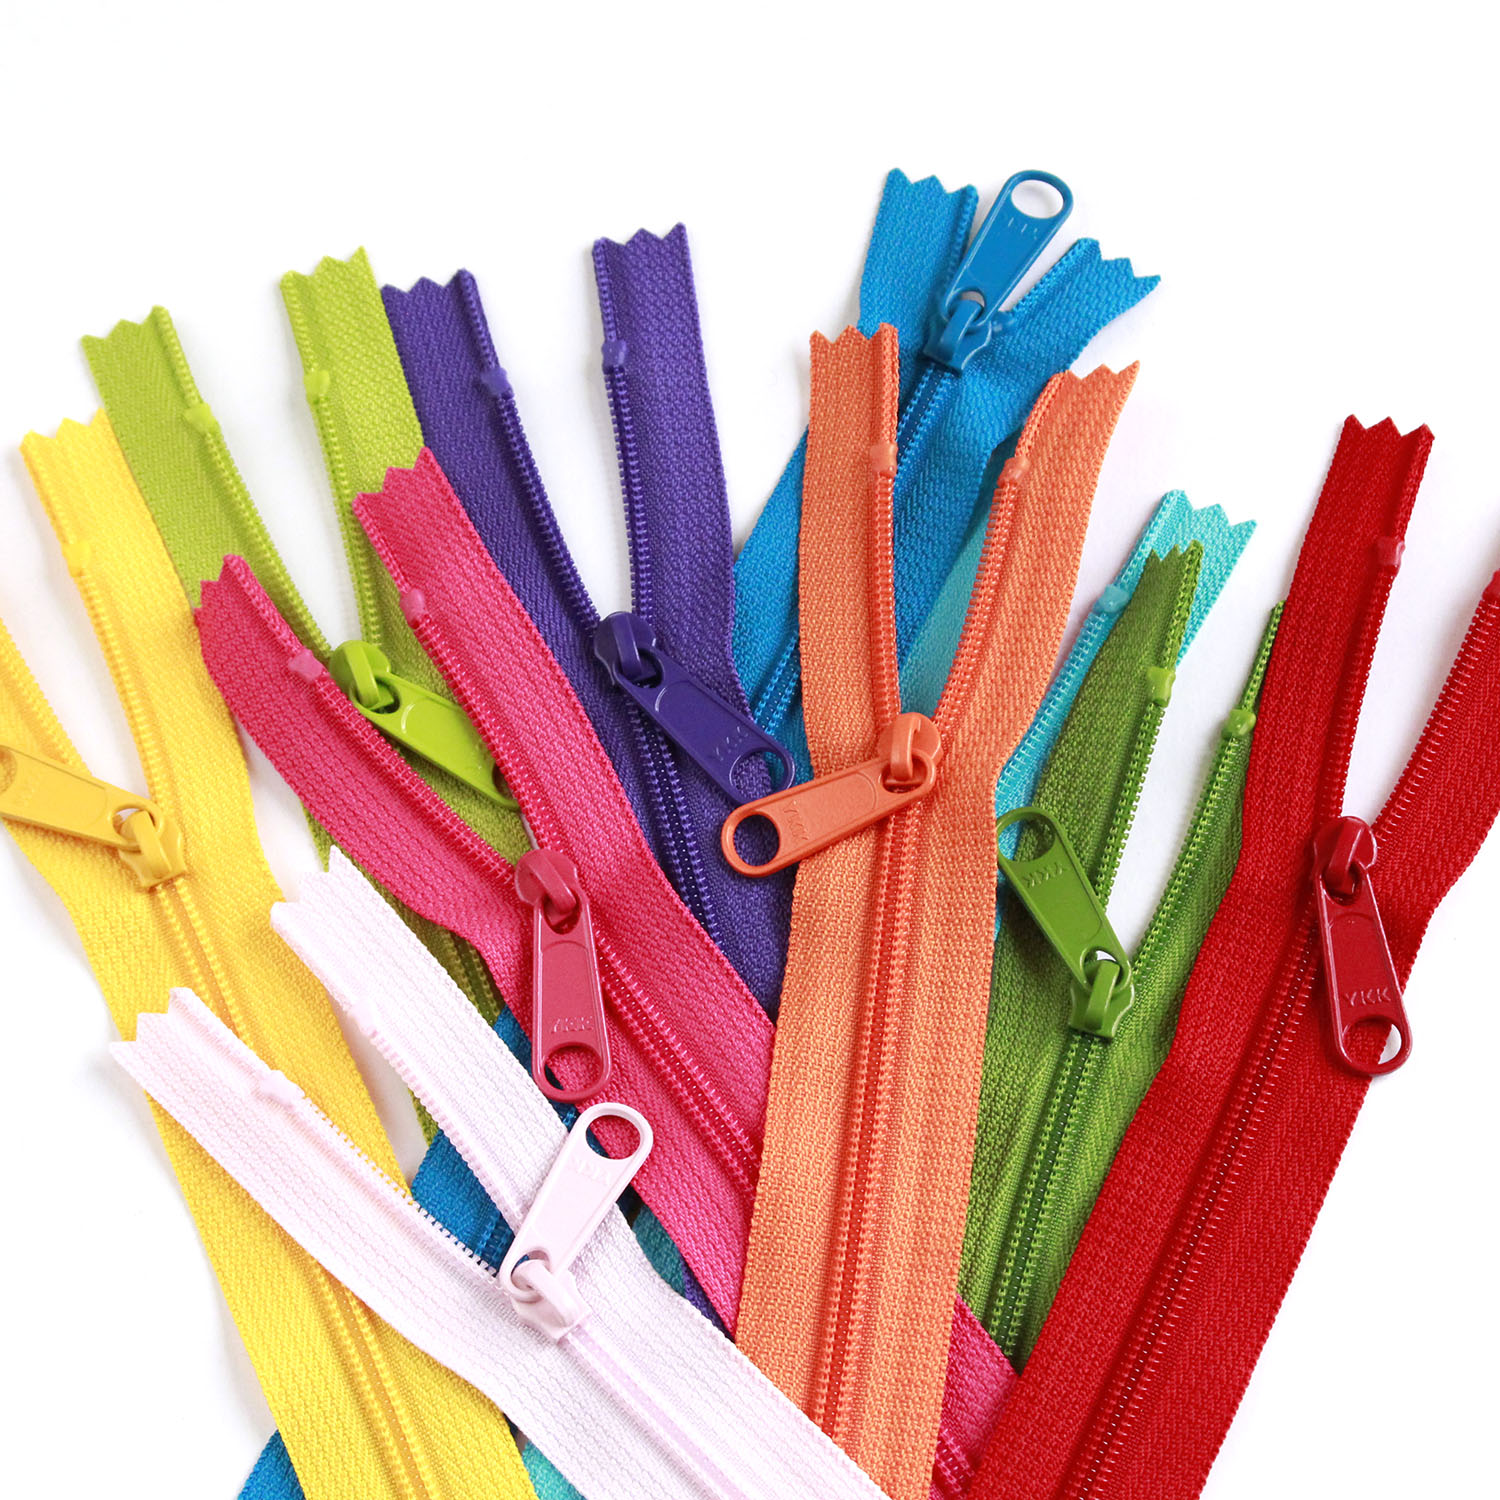
This type of zipper has coil-shaped Elements.
Compared with metal and Vislon® zippers, it is more flexible and easier to sew onto curved areas.
Concealed Zipper
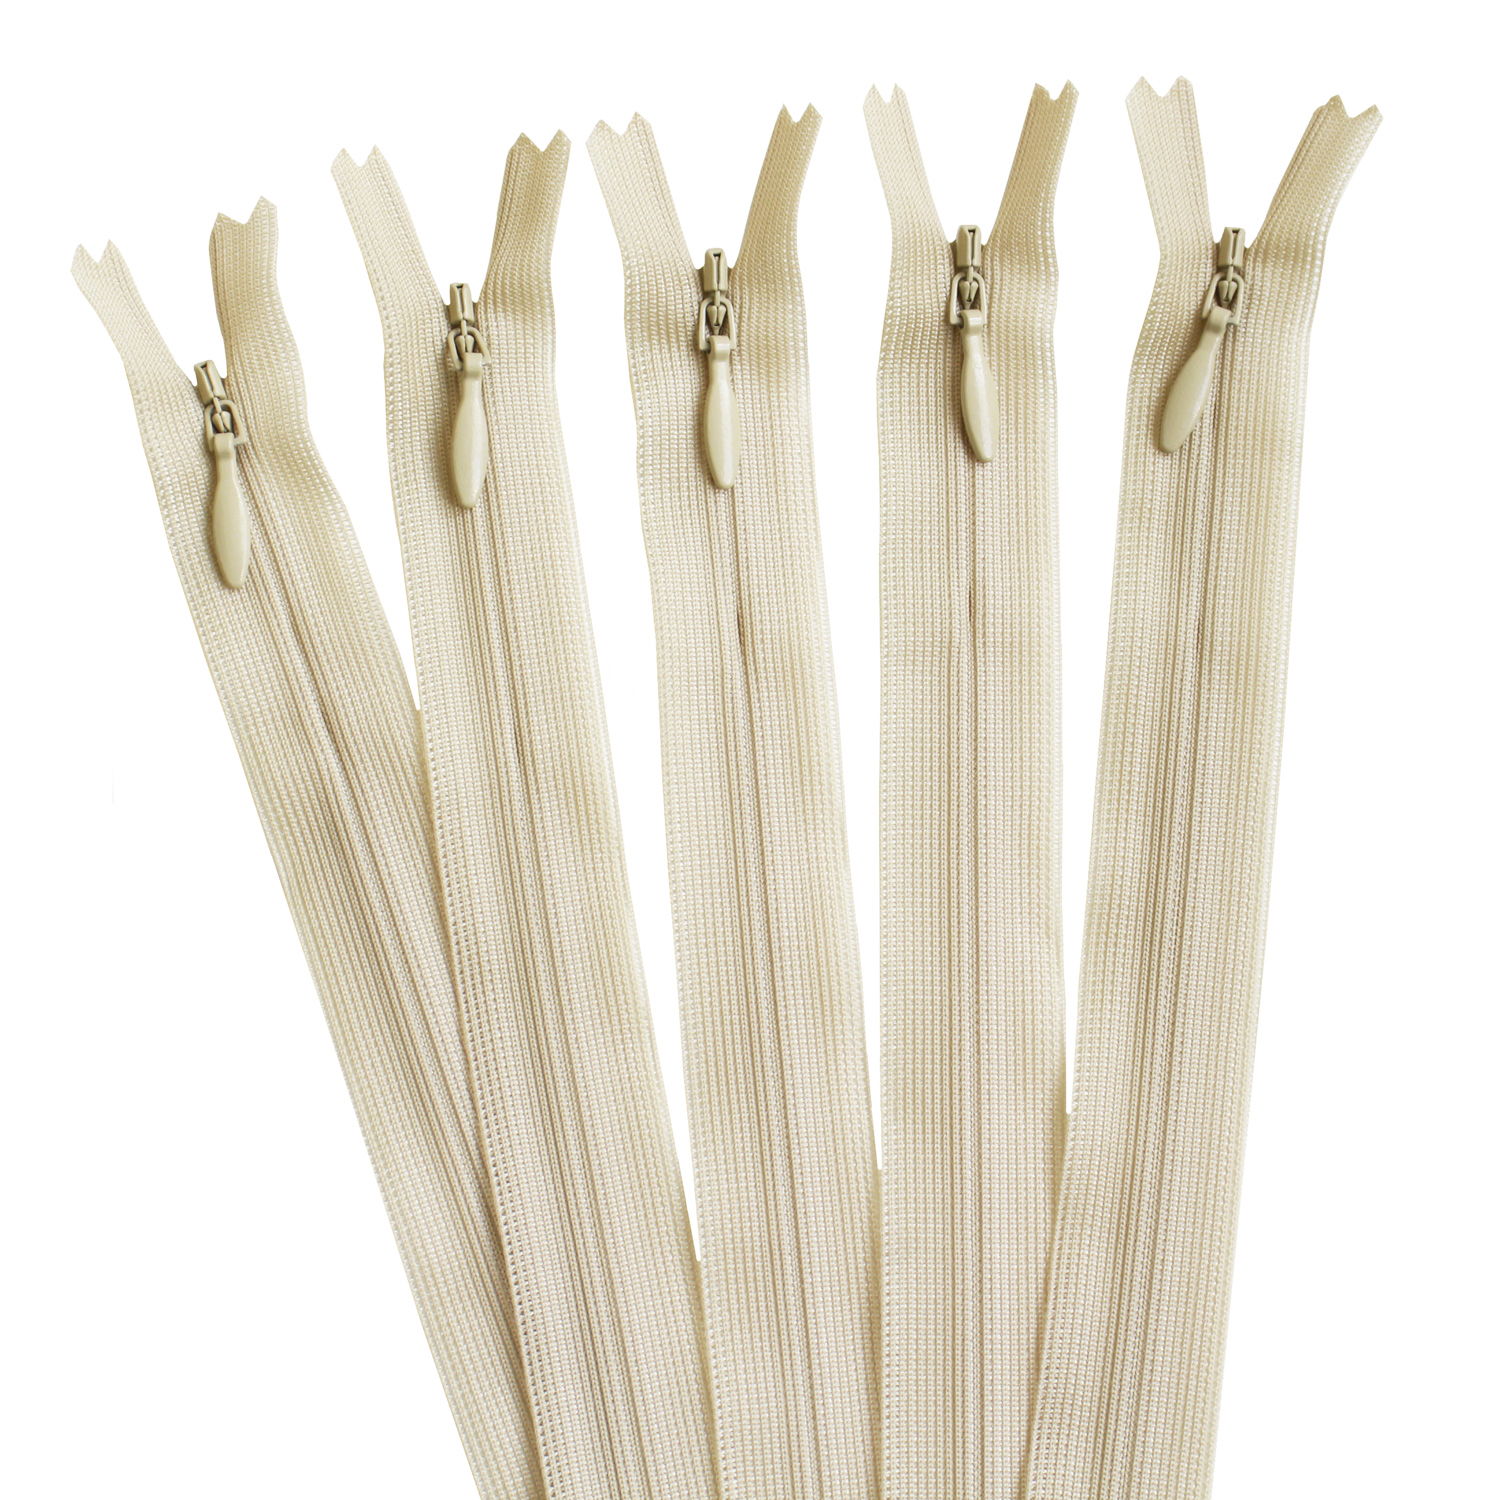
This zipper is a type of coil zipper. One of its features is that the bottom stop can be moved to adjust the zipper length.
The Elements are attached to the back of the zipper, so they are hidden from view. This type is often used for skirts, dresses, and other projects where you don’t want the zipper to show.
When sewing with a sewing machine, you will need a concealed zipper foot.
Flat Knit Zipper
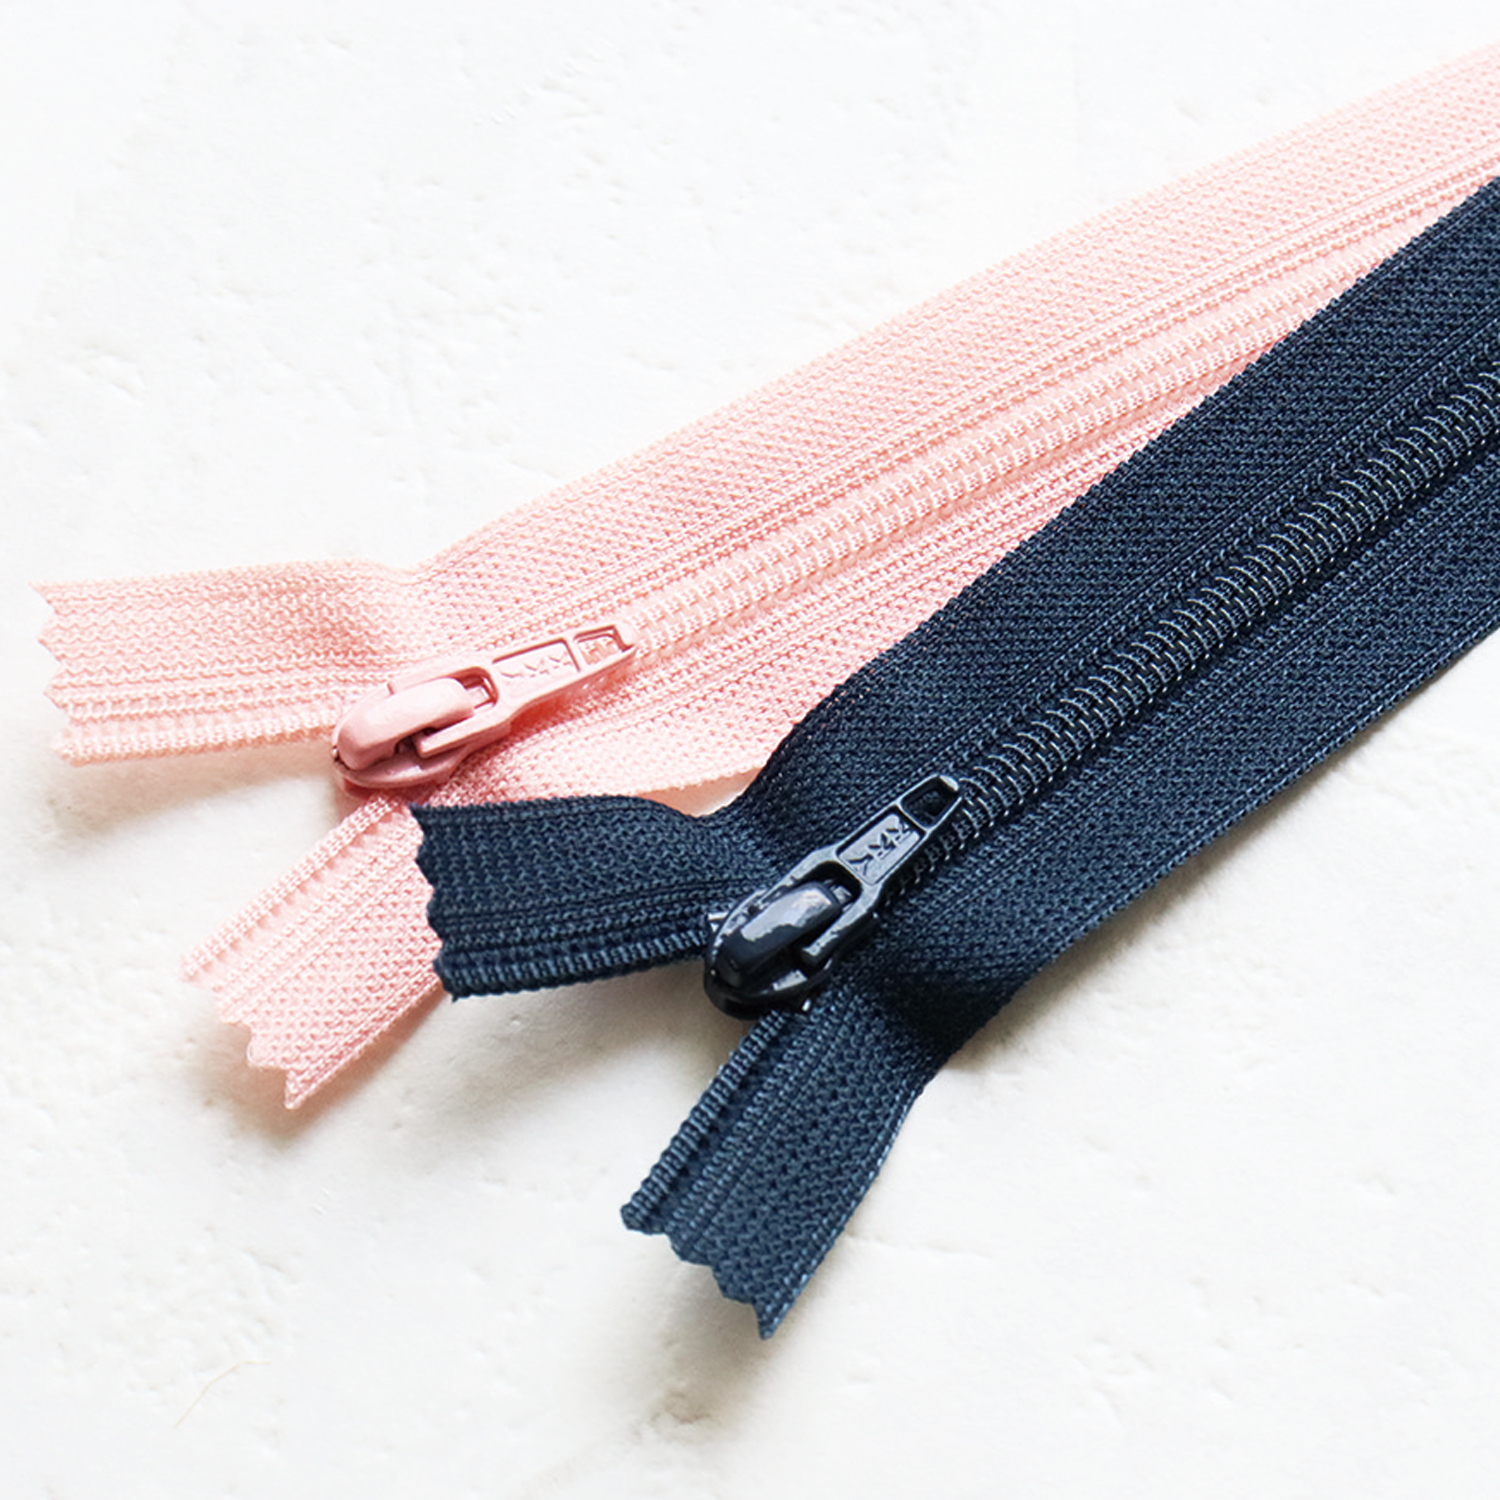
This zipper is also a type of coil zipper. Its Elements are knitted into a knit tape.
Because it is thin and soft, it works well with lightweight and stretchy fabrics.
It is suitable for many projects, including pouches, dresses, and skirt openings.
Get Everything You Need Before You Start
Now, let’s get the items you’ll need to sew in a zipper!
Use a Zipper Foot When Sewing a Zipper with a Sewing Machine
When sewing a zipper with a sewing machine, you cannot use the standard presser foot that comes with the machine because it will hit the Elements and prevent you from sewing smoothly.
Replace it with a zipper foot, which lets you sew while avoiding the Elements.
The zipper foot can be attached to either the left or right side of the needle, depending on your project.
Use a One-Sided Zipper Foot When Sewing a Regular Zipper
When sewing a zipper with a sewing machine, replace the standard presser foot with a zipper foot.
The standard presser foot hits the bottom stop at the beginning of the zipper, making it difficult to sew straight.
A one-sided zipper foot is narrower than a standard presser foot, so it can sew close to the Elements without hitting them.
Use a Concealed Zipper Foot When Sewing a Concealed Zipper
When sewing a concealed zipper with a sewing machine, use a Conceal® zipper foot.
This presser foot has grooves that fit the Elements of a concealed zipper perfectly.
Zipper Foot (for Home Sewing Machines)
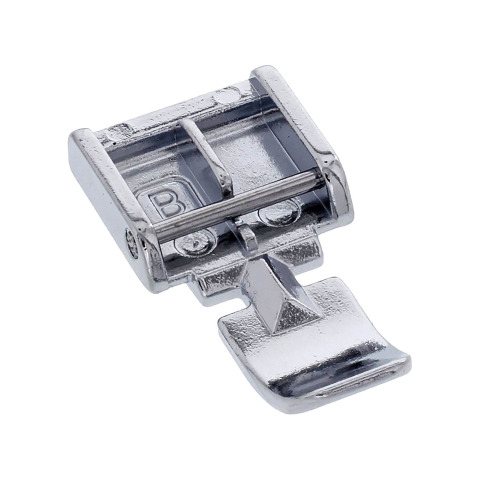
A zipper foot for sewing zippers that comes with most home sewing machines.
Attach it to the left or right side of the needle, depending on which side of the zipper you are sewing.
| Zipper Side | Foot Position |
|---|---|
| Right | Left |
| Left | Right |
Zipper Foot (One-Sided Type)
This type has only one toe on the presser foot.
Adjust the needle position to match the side of the zipper you are sewing.
| Zipper Side | Needle Position |
|---|---|
| Right | Right |
| Left | Left |
Narrow Presser Foot
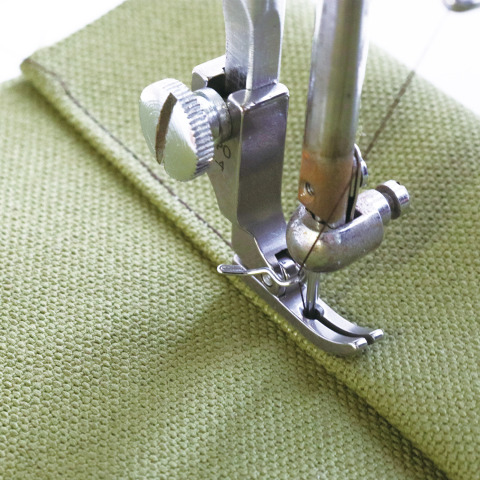
This presser foot is about 0.2 in. (5 mm) wide.
It is not made specifically for zippers, but its narrow width keeps it from hitting the Elements, making it easy to sew smoothly.
Concealed Zipper Foot
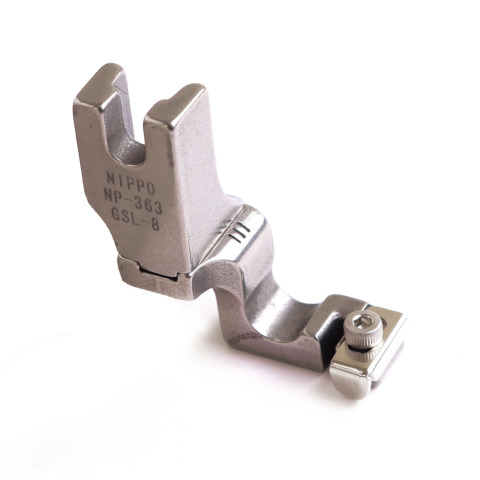
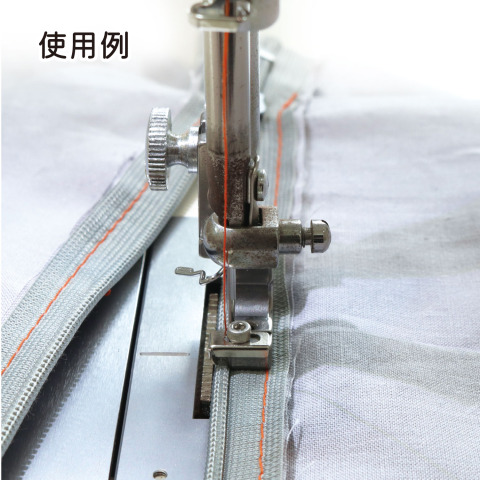
This presser foot is specially designed for concealed zippers.
Fit the Elements of the zipper into the groove on the foot before sewing.
| Zipper Side | Foot Position |
|---|---|
| Right | Fit the Elements into the left groove of the foot. |
| Left | Fit the Elements into the right groove of the foot. |
Chuko Onlineオンラインストアでご注文
Chuko Online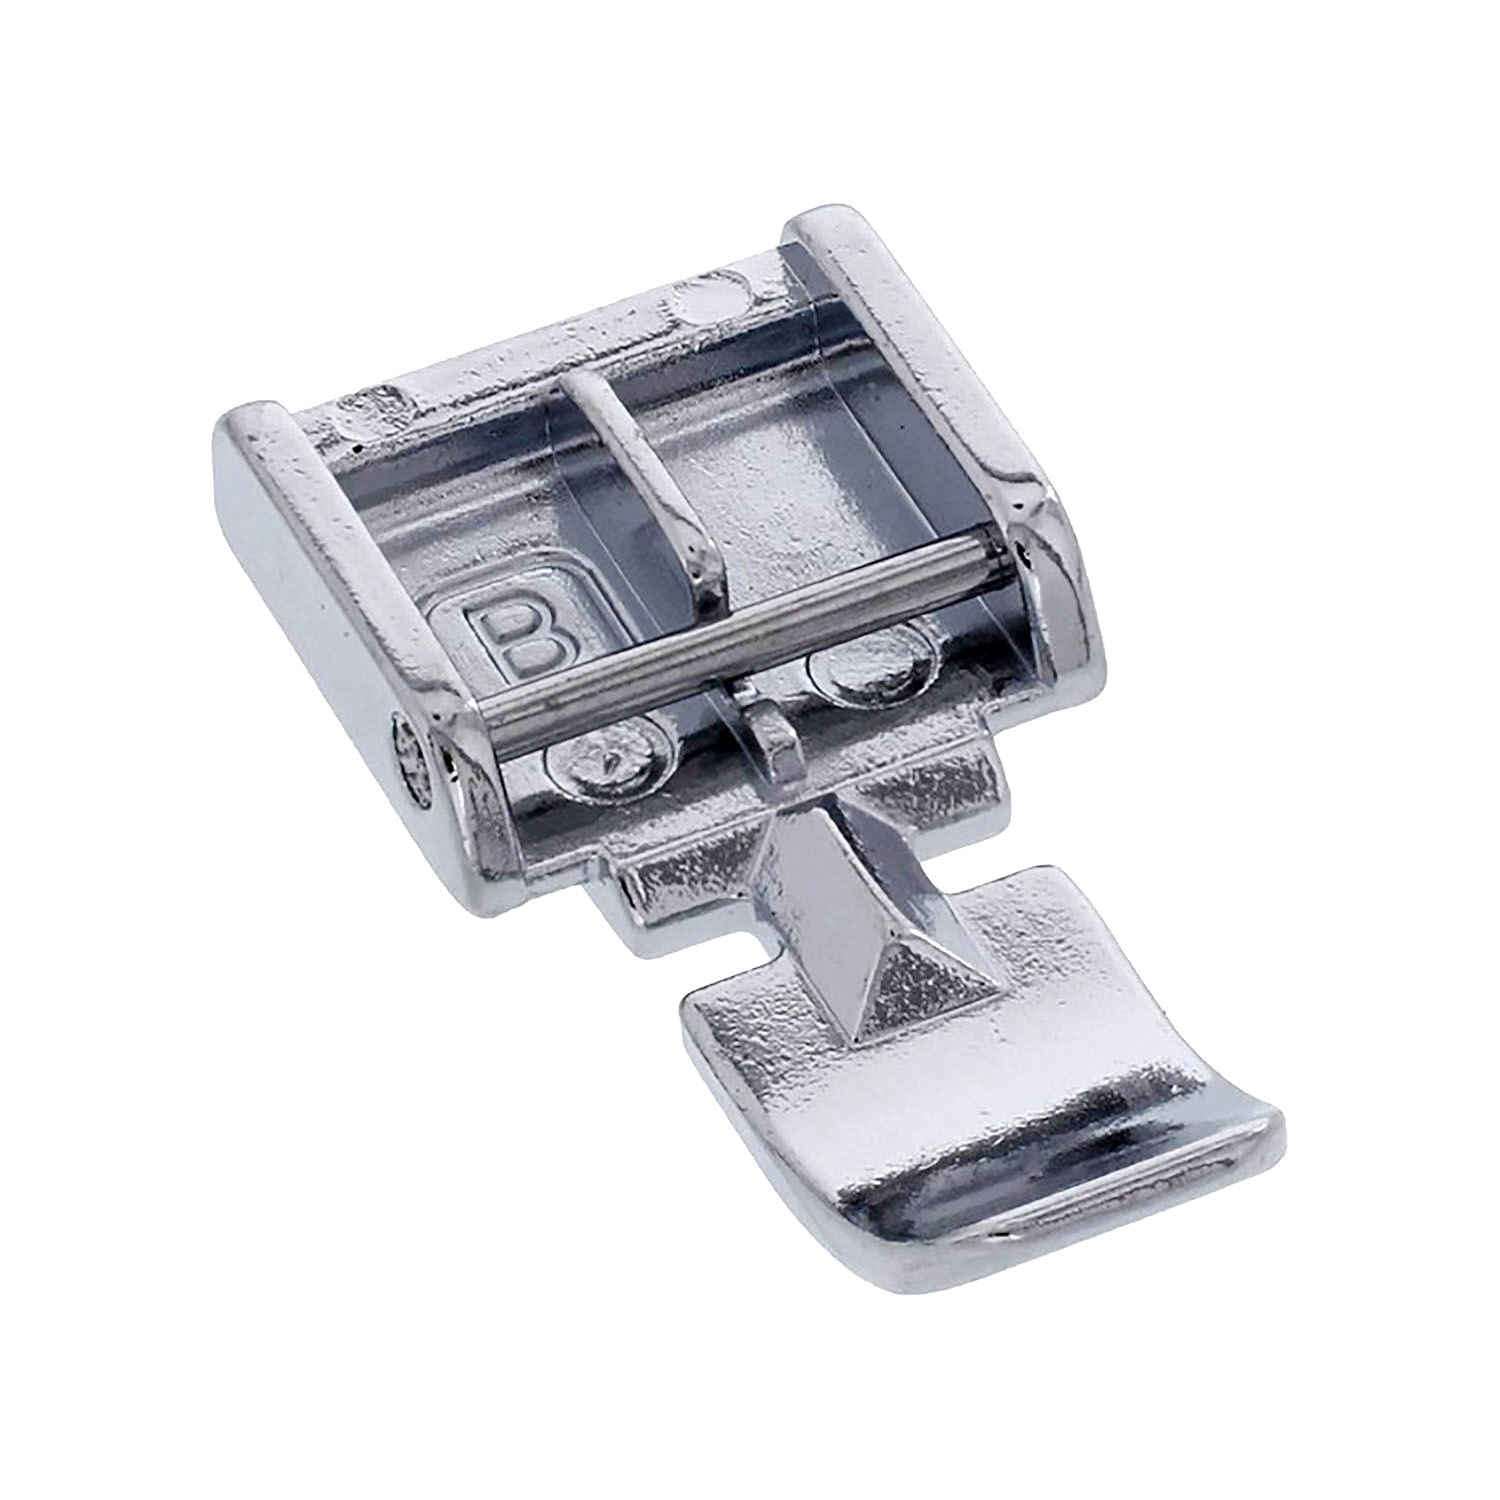
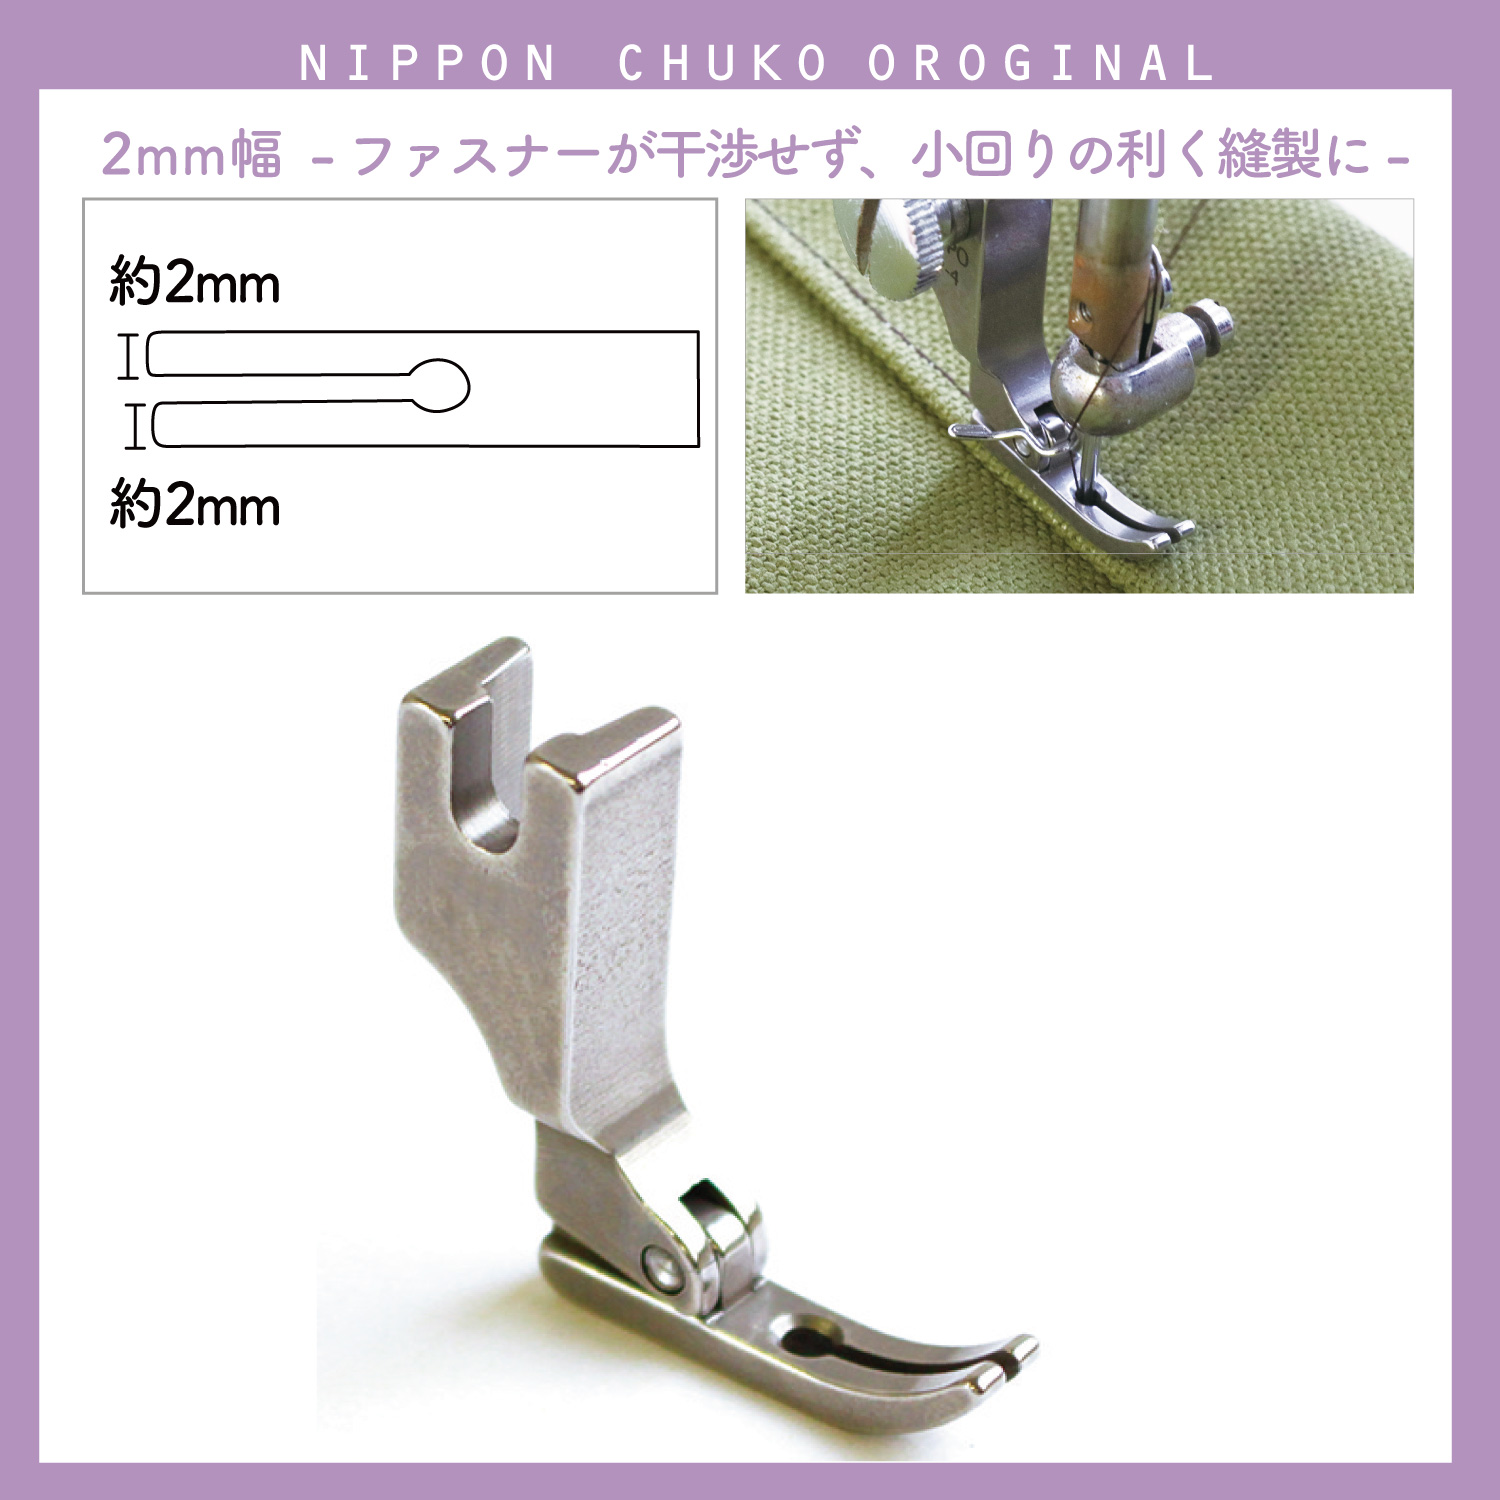
Helpful Tools for Sewing Zippers
Here are some handy tools that make sewing zippers even easier!
Sewing Clips
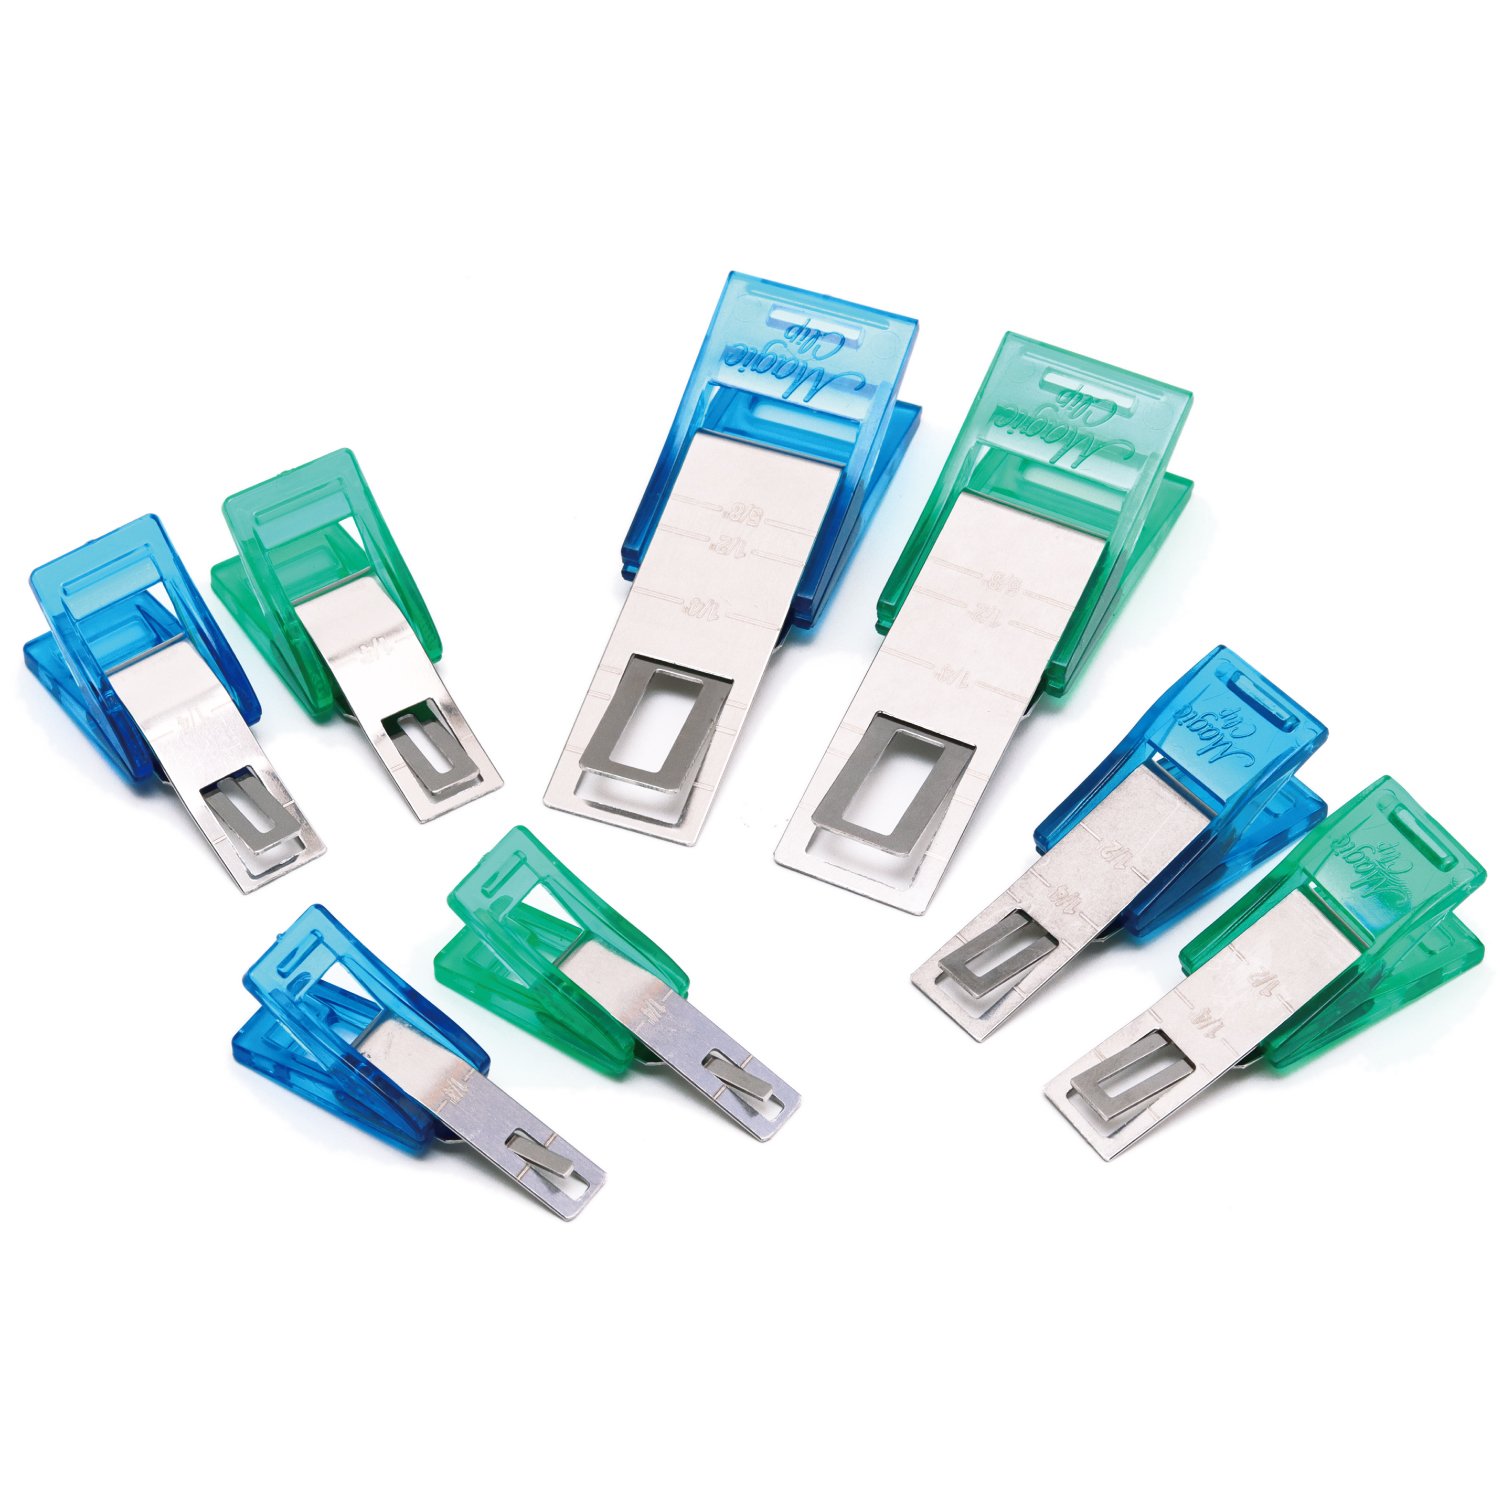
- Point 1: Sew without removing the clips! They hold the fabric securely in place, helping prevent shifting.
- Point 2: The measurement marks let you clip at an even seam allowance.
You can keep sewing without stopping to remove each clip as the needle gets closer, making the whole process smoother and easier.
Chuko Onlineオンラインストアでご注文
Chuko Online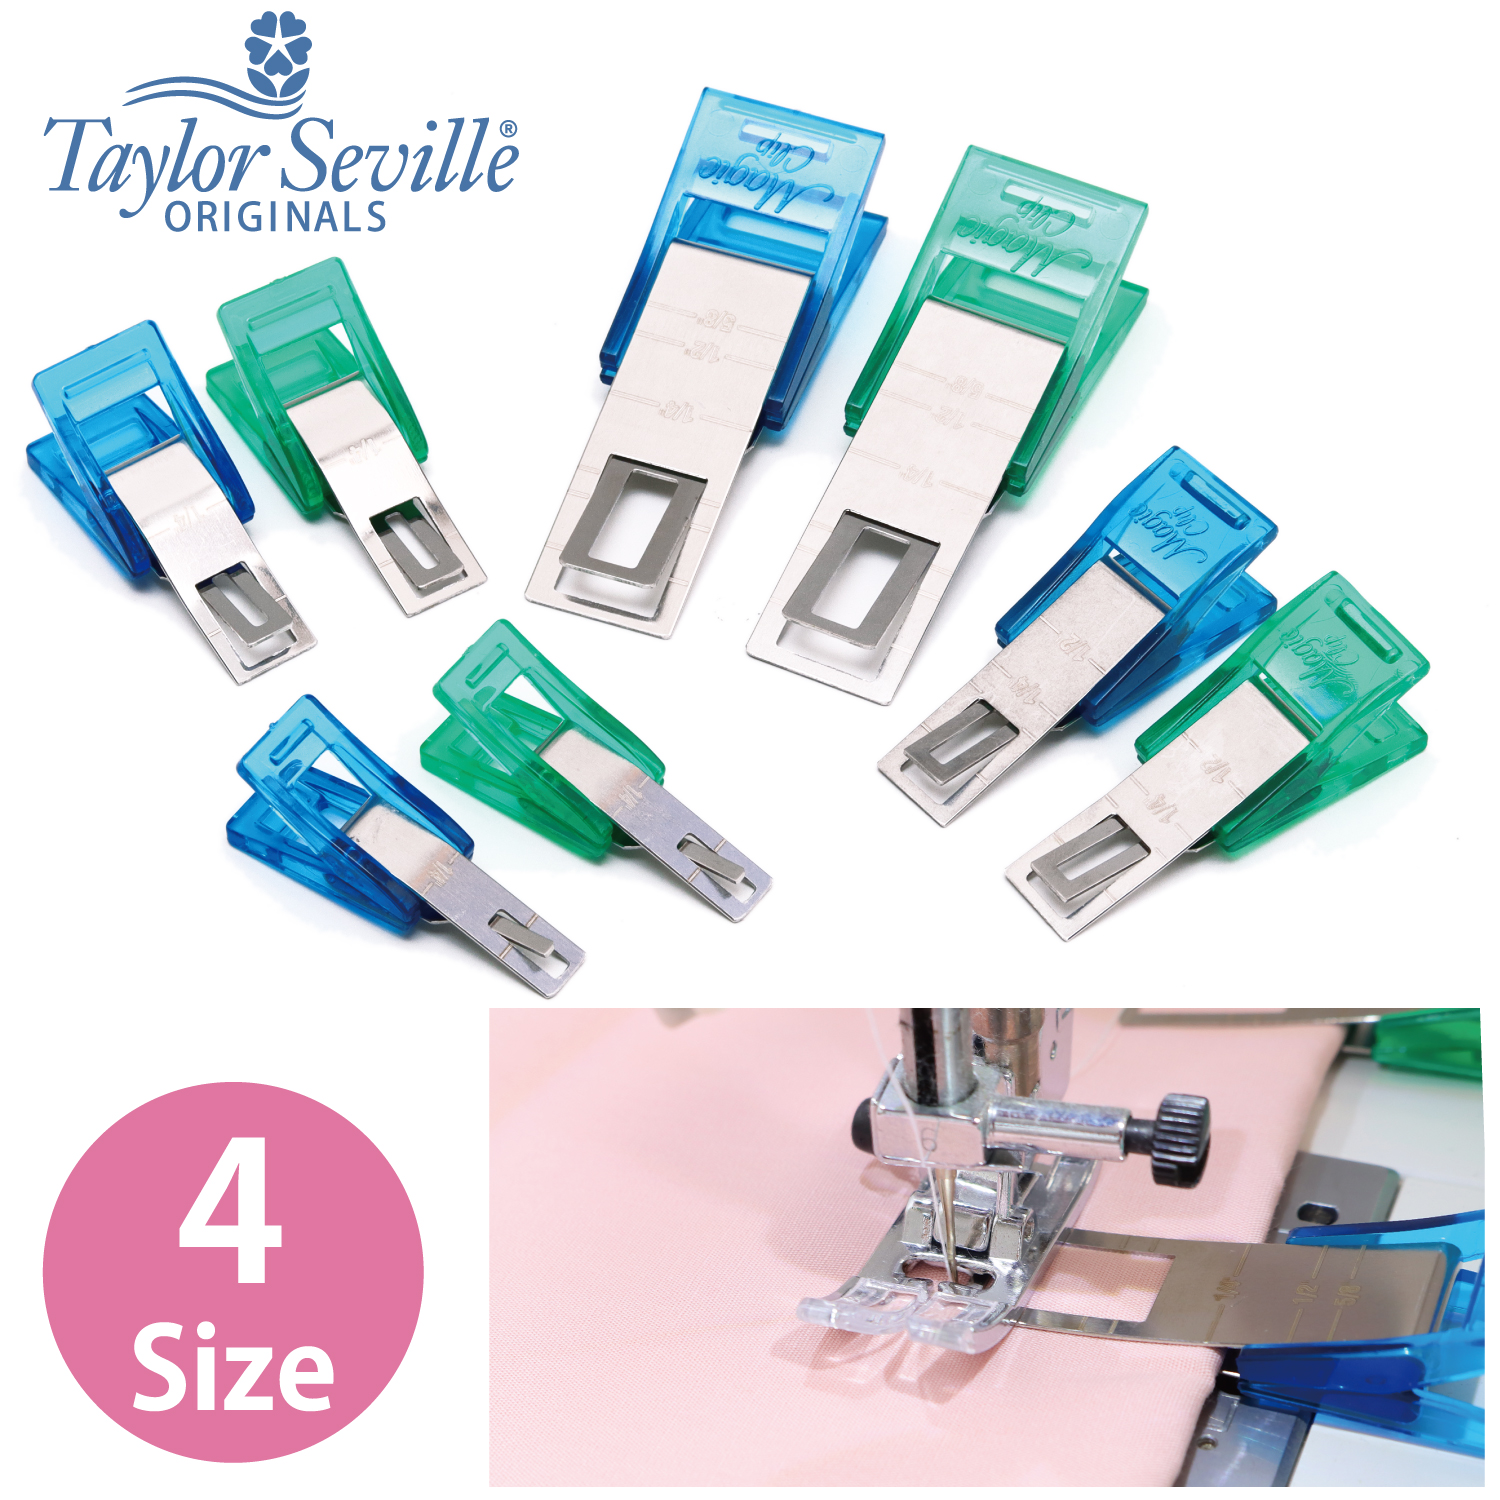
Double-Sided Fabric Tape
We recommend 3 mm (1/8 in.) wide double-sided fabric tape because it is less likely to overlap with your stitching line.
How to Use
- Apply the double-sided tape to both edges of the zipper tape. Be careful not to place the tape where the sewing machine needle will pass, as it can make the needle sticky and difficult to sew with.
- Carefully align the marks on the zipper and the fabric, then press them together.
- Sew them together with your sewing machine, and you’re done!
Apply a little sewing machine oil or silicone lubricant to a piece of scrap fabric, then use it to wipe the needle clean.
How to Sew a Zipper with a Sewing Machine: The Basic Method
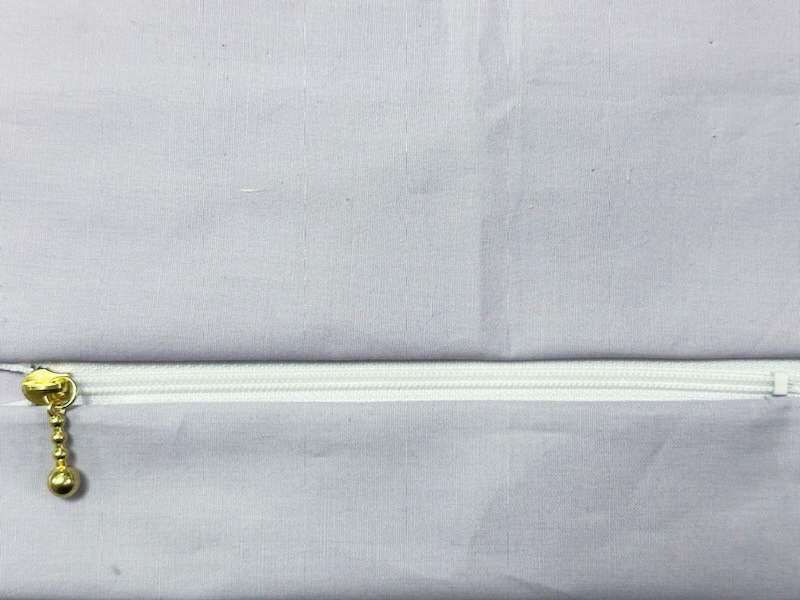
For the best finish, the visible width of the zipper should be about 1–1.5 cm (3/8–5/8 in.) after sewing.
If you sew too close to the Elements, the slider may catch and become difficult to open and close. It can also make the finished zipper look less neat.
Be sure to replace the standard presser foot with a zipper foot before you start sewing.
Mark the Center of the Zipper and the Fabric
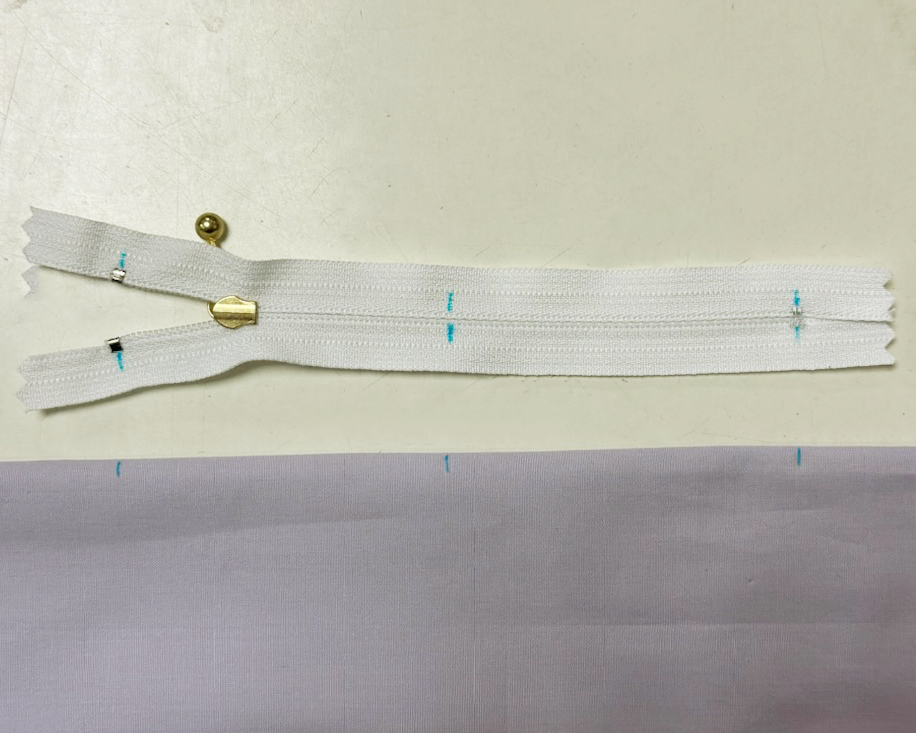
Mark the center, top stop, and bottom stop on both the zipper and the fabric.
Choose a zipper that is about 3–3.5 cm (1 1/4–1 3/8 in.) shorter than the fabric you are sewing.
The zipper length may vary depending on the project, so be sure to follow your pattern or instructions.
Next, align the center mark on the zipper with the center mark on the fabric.
Make sure the zipper is securely held in place so it doesn’t shift while you sew.
Here are three recommended ways to hold it in place:
- Pins or sewing clips
- Basting thread
- Double-sided fabric tape
Try the method that works best for you! ♪
Baste the Zipper in Place
Attach the zipper foot so that the needle is positioned on the left side of the foot.
As you sew, move the zipper slider as needed so it does not touch the presser foot.
Once the zipper is sewn securely from end to end, the basting is complete.
Sew the Final Stitch
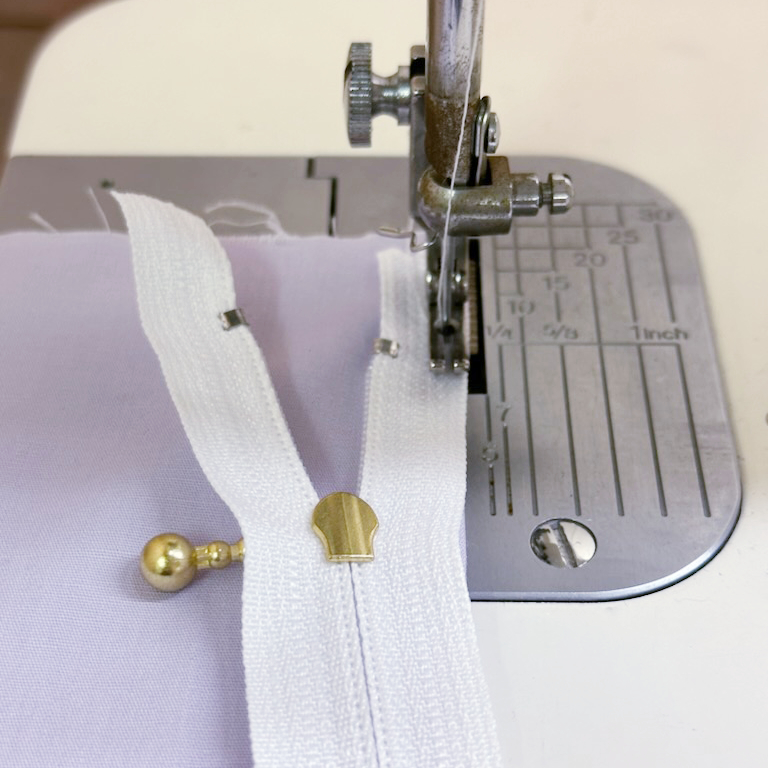
Now sew the final seam to attach the fabric securely.
Since you’ll be sewing close to the zipper, use a one-sided zipper foot instead of the standard presser foot.
This will help you sew accurately without the stitching line shifting.
When sewing a zipper onto fabric, move the slider as you sew.
Even if the presser foot does not touch the slider, it can still cause the stitching to shift slightly.
When the presser foot reaches the slider, stop sewing, move the slider past the foot, and then continue sewing.
Advanced Tip #1: Sewing a Zipper onto a Curved Edge
Pin the Zipper to the Fabric
Align the edge of the fabric with the edge of the zipper tape, then secure it with pins.
Cut small 0.5 cm (1/4 in.) notches into the curved edge of the zipper tape so it follows the curve of the fabric smoothly.
Sew the Zipper
Baste the zipper in place, then sew the final seam to attach the fabric.
That’s it!
Advanced Tip #2: Sewing with Folded Zipper Ends
This method hides the zipper tape ends for a cleaner, neater finish.
It is especially recommended for making flat pouches.
Fold and Glue the Zipper Tape
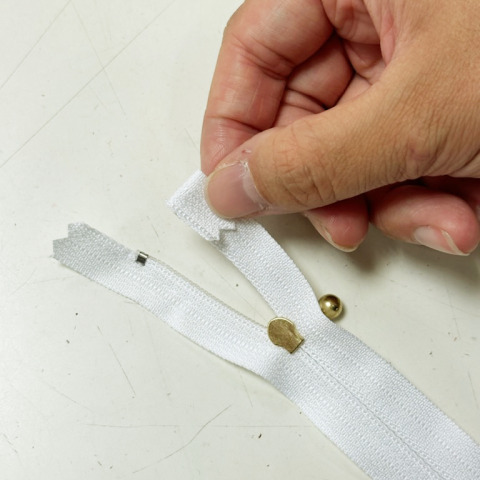
Fold the zipper tape to the back at the top stop and secure it with fabric glue.
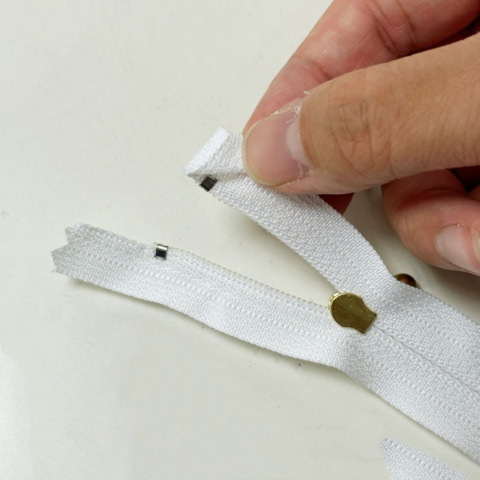
Then fold the tape into a triangle and glue it in place.
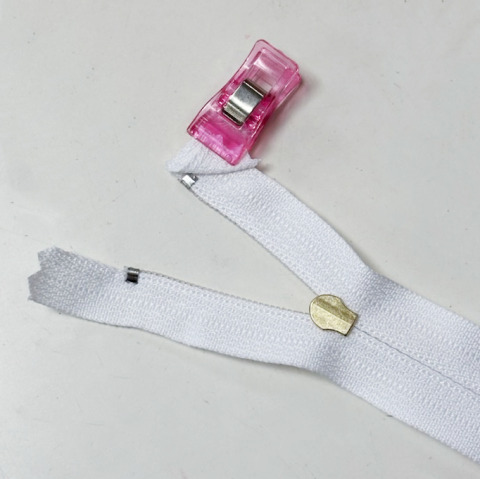
Repeat these steps on all four corners of the zipper tape, then wait for the glue to dry completely.
While the glue is drying, mark the center of the zipper.
Sew the Zipper the Same Way as the Basic Method
Align the center of the zipper with the center of the fabric, just as you did in the basic method.
Baste the zipper in place, then sew the final seam.
Now your zipper is finished!
Troubleshooting Corner: Your Questions Answered!
In Japan, zippers are usually attached so that the slider is on the left side when the zipper is closed.
This is because most people are right-handed, making the zipper easier to open with the right hand.
If you’re left-handed, you may find it more comfortable to attach the zipper with the slider on the right side instead.
You can calculate the length of the end tabs using this formula:
● × 2 + 2 cm (seam allowances)
Here, ● is the distance from the end of the zipper tape to the zipper stop.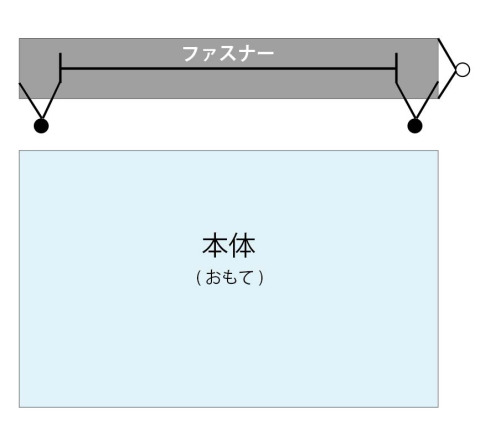
Sew Zippers with Confidence!
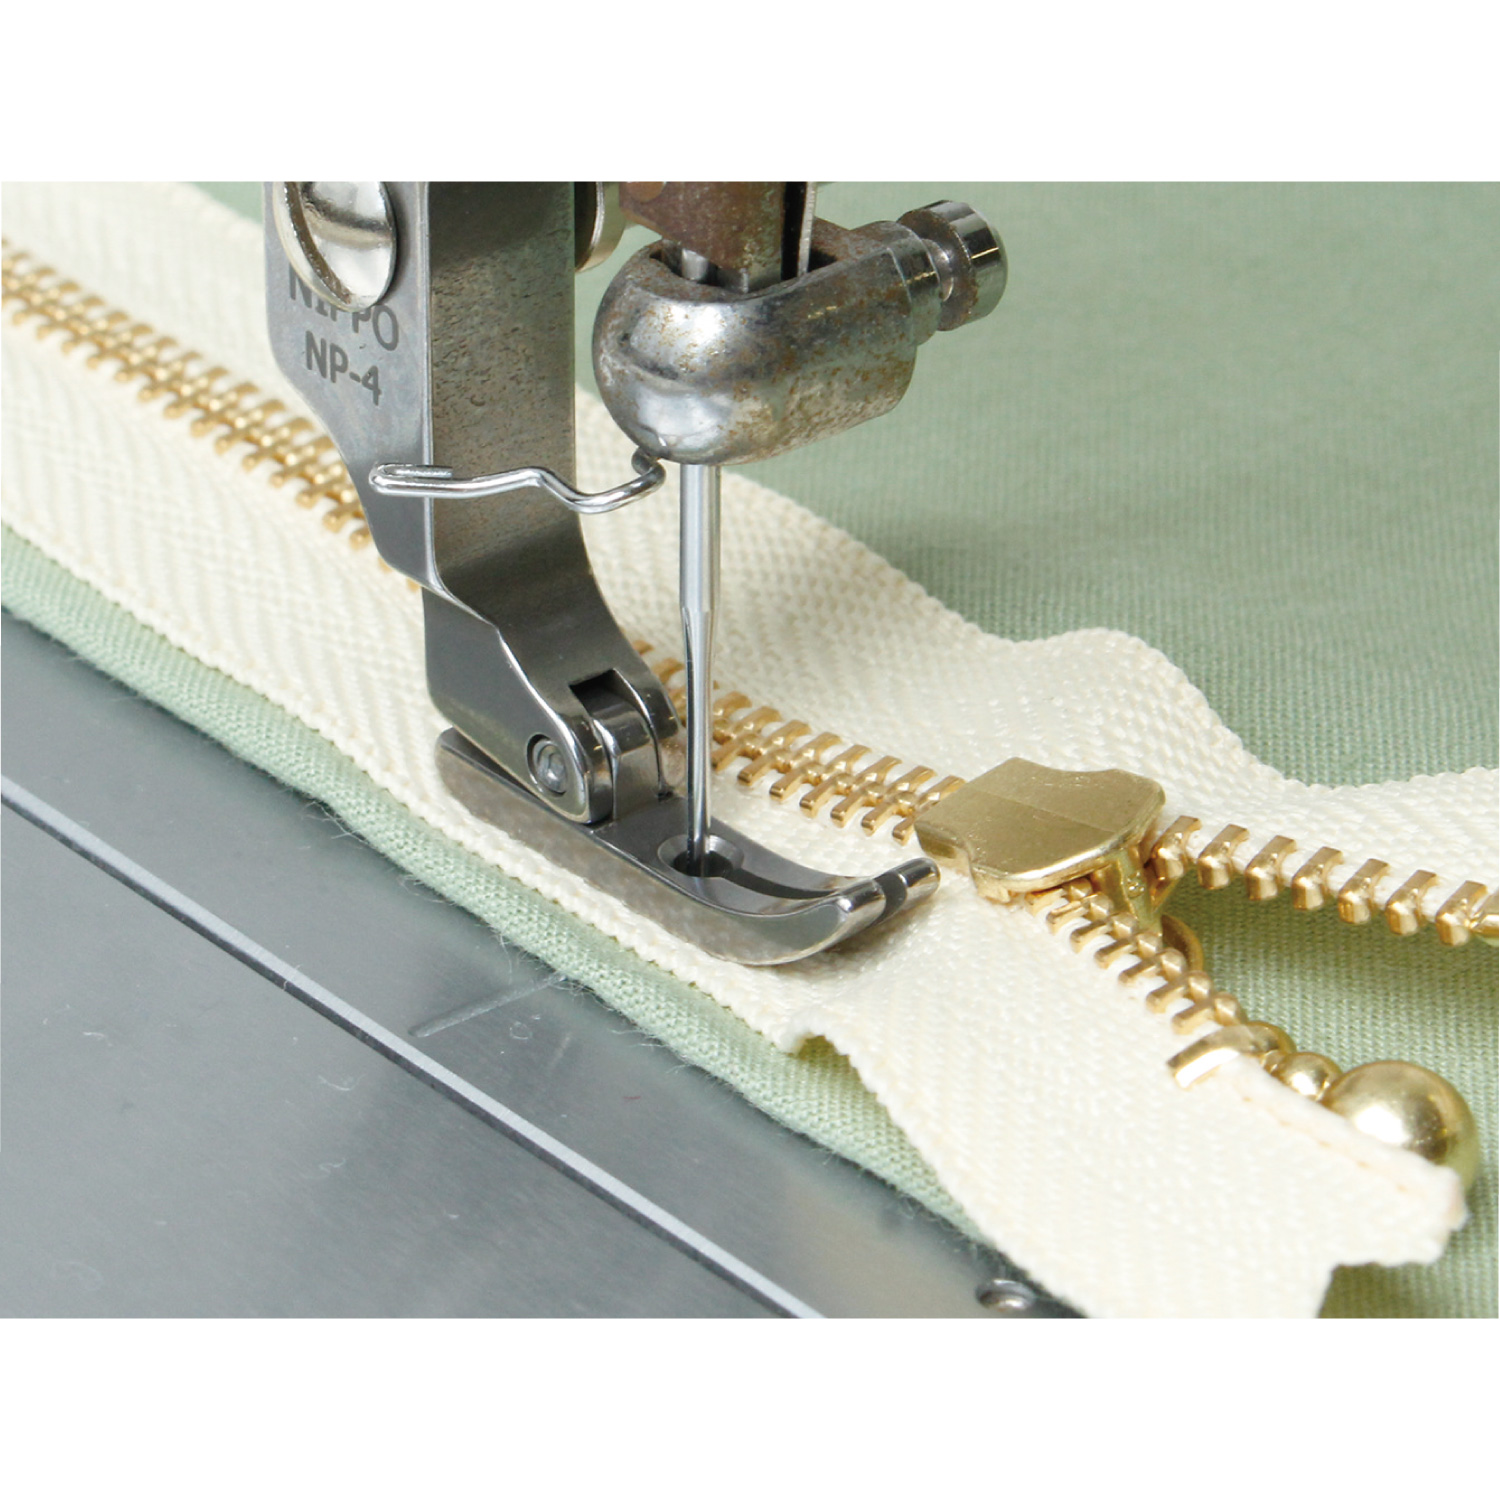
Sewing in a zipper can seem a little intimidating. You might worry about getting it right.
But don’t worry!
With the tools we introduced in this article, anyone can sew in a zipper neatly with a sewing machine.
If you’re worried about the zipper shifting while you sew, try using sewing clips or double-sided fabric tape to hold it securely in place.
Give them a try, and enjoy sewing with confidence!


We also share products and special offers on Instagram.
Please follow our Instagram account here!
Our Official Websites
Chuko Online: https://www.nippon-chuko.co.jp/shop
Facebook: https://www.facebook.com/nipponchuko

Chuko Onlineではみなさまに日々の手芸用品の仕入れを便利にしていただけるように、お得なセール情報などを更新しております! ▽Chuko Onlineのサイトはこちらから! https://www.nippon-chuko.co.jp/shop/ みなさまからのご注文をお待ちしております。