

目次
- Is Straight-Needle Knitting Difficult?
- What Tools Do We Need?
- What Is a “Gauge” That We See in Every Pattern?
- How Do We Read a Knitting Pattern? What Are the Basic Stitches?
- “Wait… How Many Rows Have I Knitted?” Tips to Avoid Losing Count
- “When I Try Pattern Knitting but Lose Track of Where the Pattern Starts…”
- Uneven Stitches — “Too Tight, Too Loose, and My Fabric Looks Wobbly…”
- Wrap-Up
Is Straight-Needle Knitting Difficult?
Hello, this is Y from the 3rd-floor section.
Now that December has started, the cold days are really here in Japan.
When it gets cold, many of us feel like making something with yarn. Crocheting has been popular since last year, but recently we often hear people say, “I want to try straight-needle knitting too!”
(Translation staff note: In Japan, knitting has been booming among people in their teens to 30s since last year. Some craft stores have even seen yarn sales increase by 50%. At Nippon Chuko, we’ve also held pre-order events for yarn and actively added new items!)
Once we can use straight needles, we can make bigger items like sweaters. For those interested in knitting, it might even feel like a dream skill to have.
But many of us think, “Straight-needle knitting looks difficult…”
So, staff member Y decided to give it a try!
In this post, Y will share the items actually used while knitting and the points where she got stuck along the way. (^^)/
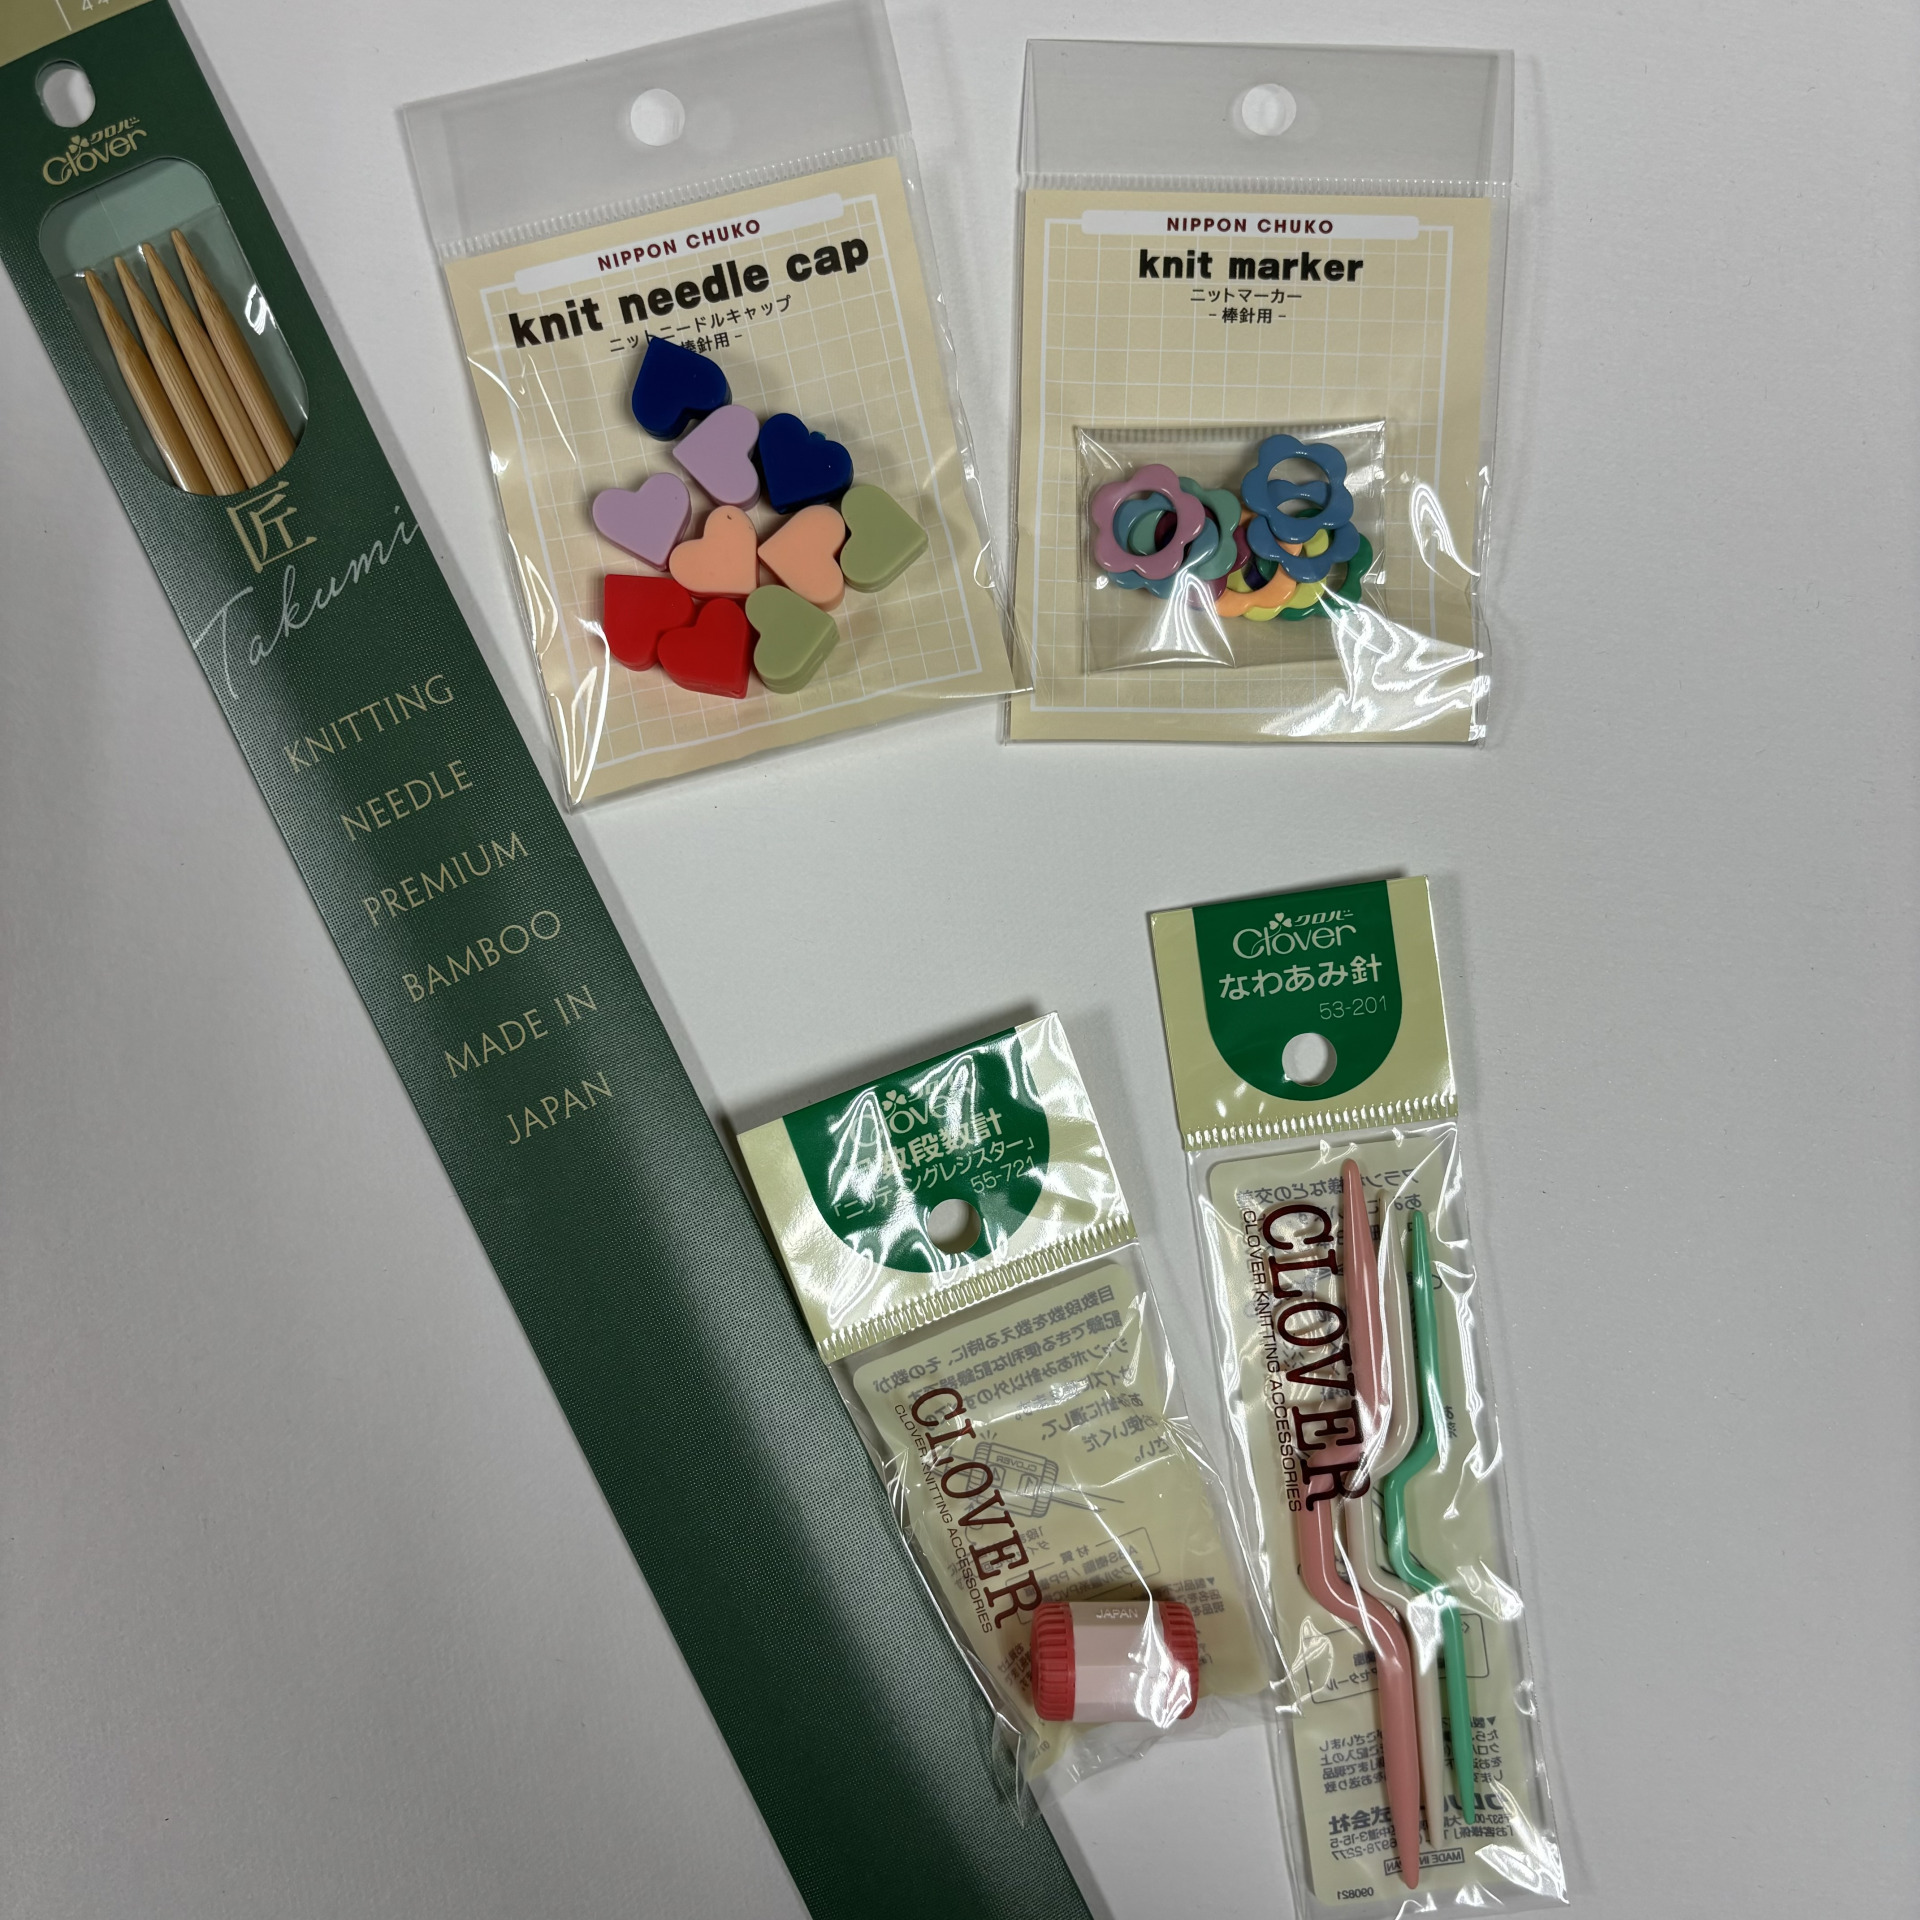
What Tools Do We Need?
By the way, my experience with straight-needle knitting is only from when I tried a little bit in elementary school—so I’m basically a beginner.
This time, we’ll try making a pattern that’s unique to straight needles. We’re going to knit a simple blanket.
First, I gathered the tools that seemed necessary.
Here’s what I prepared:
- Size 8 straight needles
- Needle caps
- Knit markers
- Cable needle
- Knitting counter
With these items, we can make most basic projects.
Alright, let’s start knitting!!
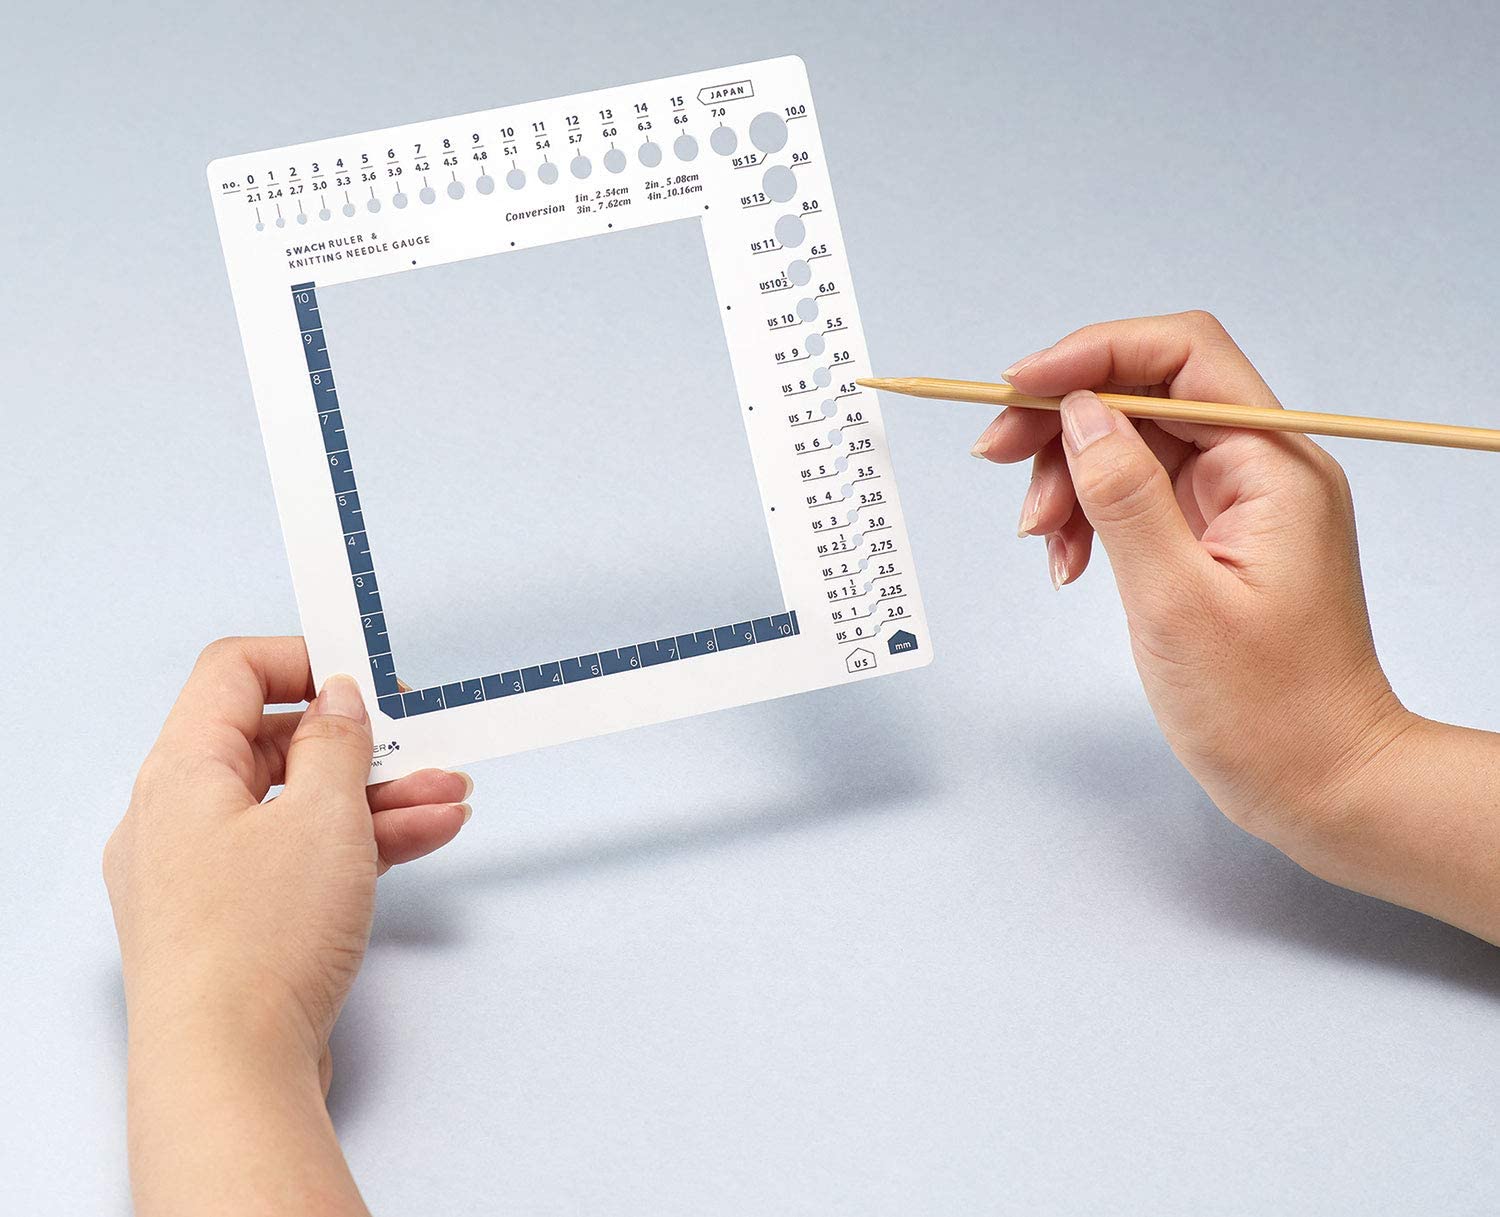
What Is a “Gauge” That We See in Every Pattern?
When you look at Japanese knitting patterns or craft books, you often come across the phrase “ゲージをとる”
(This means “check your gauge.”)
This is something that doesn’t appear in crochet.
A gauge means checking the size of our stitches.
Even with the same yarn and needles, some of us knit tightly while others knit loosely.
So, to make the correct size, we knit a small sample first and count how many stitches and rows we have in 10 cm.
This is called “ゲージをとる(check your gauge)”
If we skip the gauge and start knitting right away, there’s a good chance the finished size won’t match!
So let’s always take a gauge first.
Using a knit gauge tool makes this step easier.
How Do We Read a Knitting Pattern? What Are the Basic Stitches?
In straight-needle knitting, almost everything is made with just two stitches: the knit stitch and the purl stitch.
By combining and applying these two stitches, we can create many different patterns.
So, which parts of a pattern chart are knit stitches and which parts are purl stitches?
Let’s take a look at an actual knitting chart.
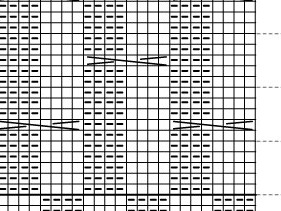
In most pattern charts, a blank square means a knit stitch, and a square with a horizontal line means a purl stitch.
Some charts use the opposite symbols, so it’s important to check before we start knitting. ⚠️
The first point where I (staff Y) got confused was that the instructions switch depending on the direction we’re knitting!
What does that even mean? Let’s look at it step by step with images. 💦
In straight-needle knitting, we always knit from right to left.
This direction never changes.
For the first row, we follow the chart exactly as it is, knitting from right to left.
If the chart shows a knit stitch, we knit; if it shows a purl stitch, we purl.
When we reach the end, we flip the work over and knit the second row—again from right to left.
Here’s the important part: on even-numbered rows, the back side becomes the front while we’re working.
Since the right and wrong sides switch, we have to do the opposite stitch of what the chart shows for those rows.
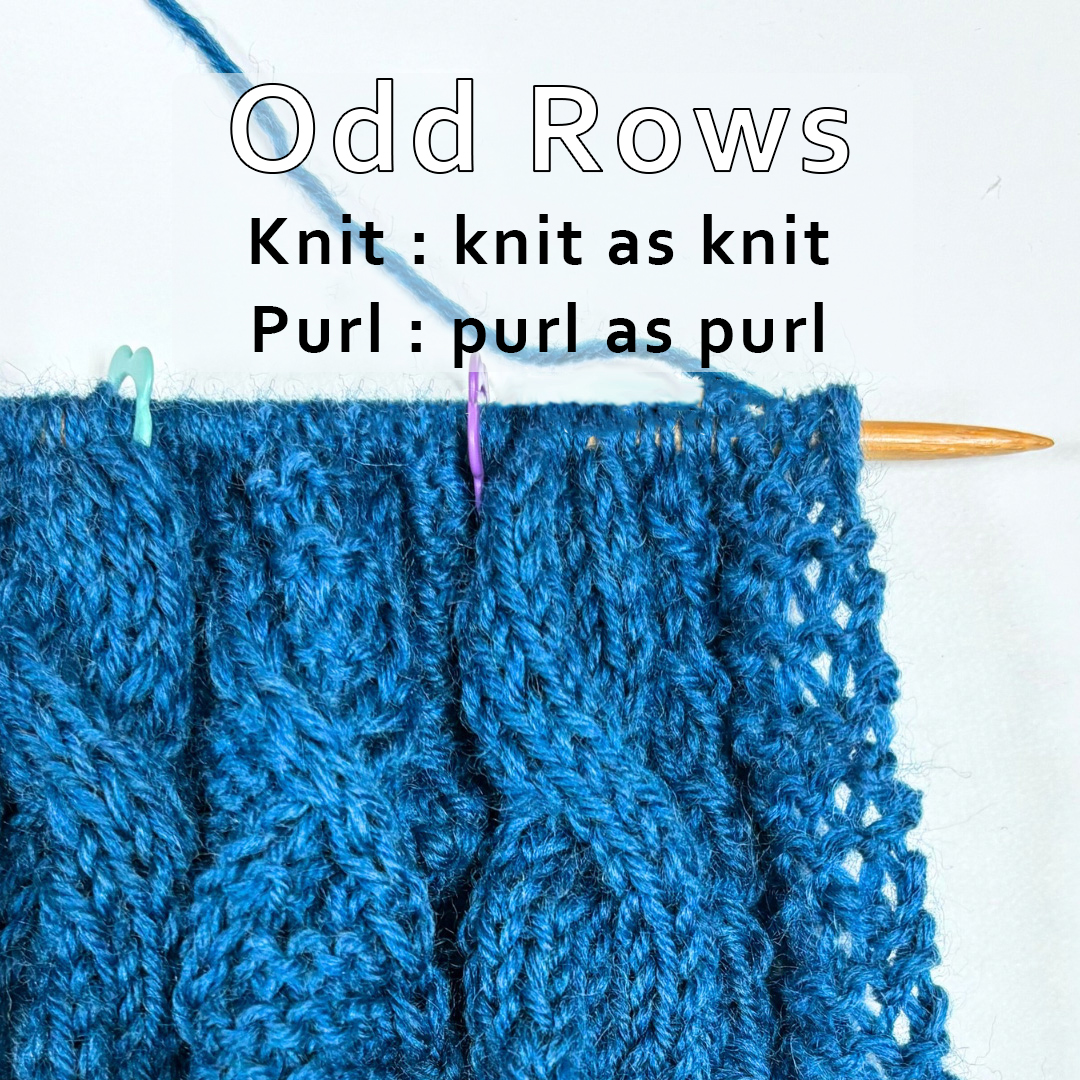
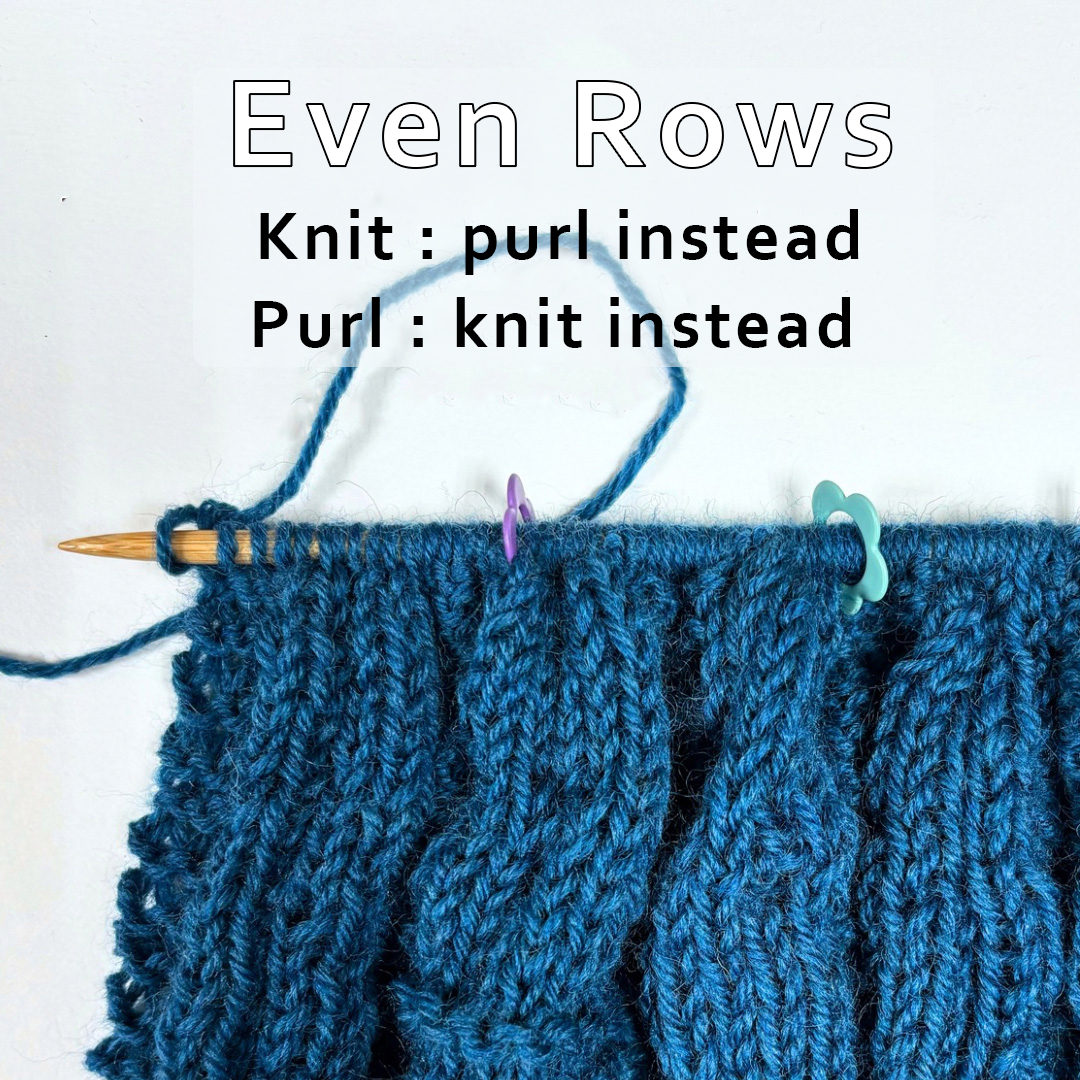
To summarize:
Odd-numbered rows →
We follow the chart exactly: knit when it shows a knit stitch, and purl when it shows a purl stitch.
Even-numbered rows →
We do the opposite of the chart: if it shows a knit stitch, we purl; if it shows a purl stitch, we knit.
Once we keep this in mind, we’ll make far fewer mistakes.
“Wait… How Many Rows Have I Knitted?” Tips to Avoid Losing Count
We often think, “Of course I can remember how many rows I’ve knitted!”
So we keep knitting and knitting… and then suddenly realize we’ve been working on autopilot and have no idea what row we’re on anymore!
This is a surprisingly common problem. But don’t worry—this tricky point can be solved with the right knitting tools. ◎
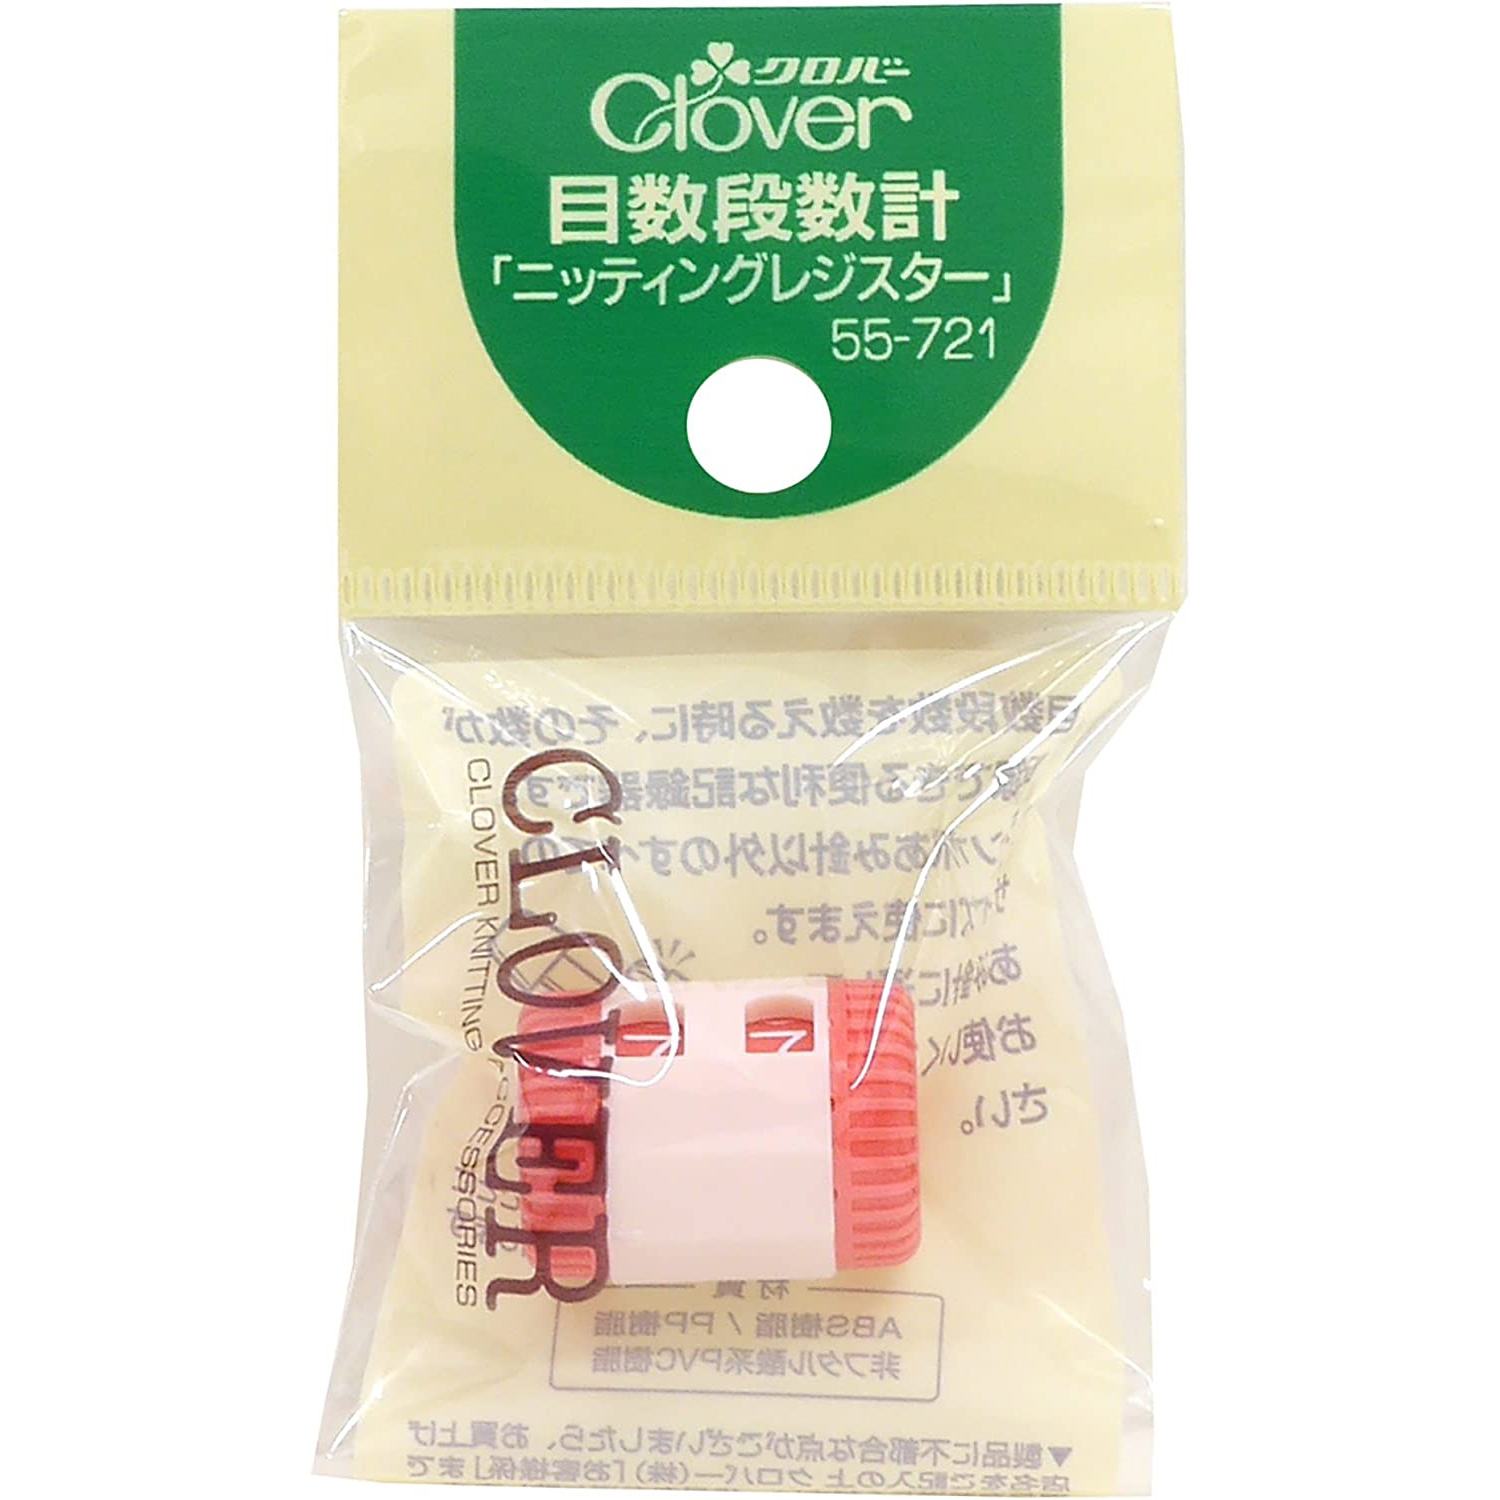
① For Detailed Counting, Let’s Use a Row Counter
This tool lets us turn the dial each time we finish a row so we always know exactly which row we’re on.
By using this counter, we can avoid miscounting, and it also helps us quickly check where to restart when we take a break from knitting.
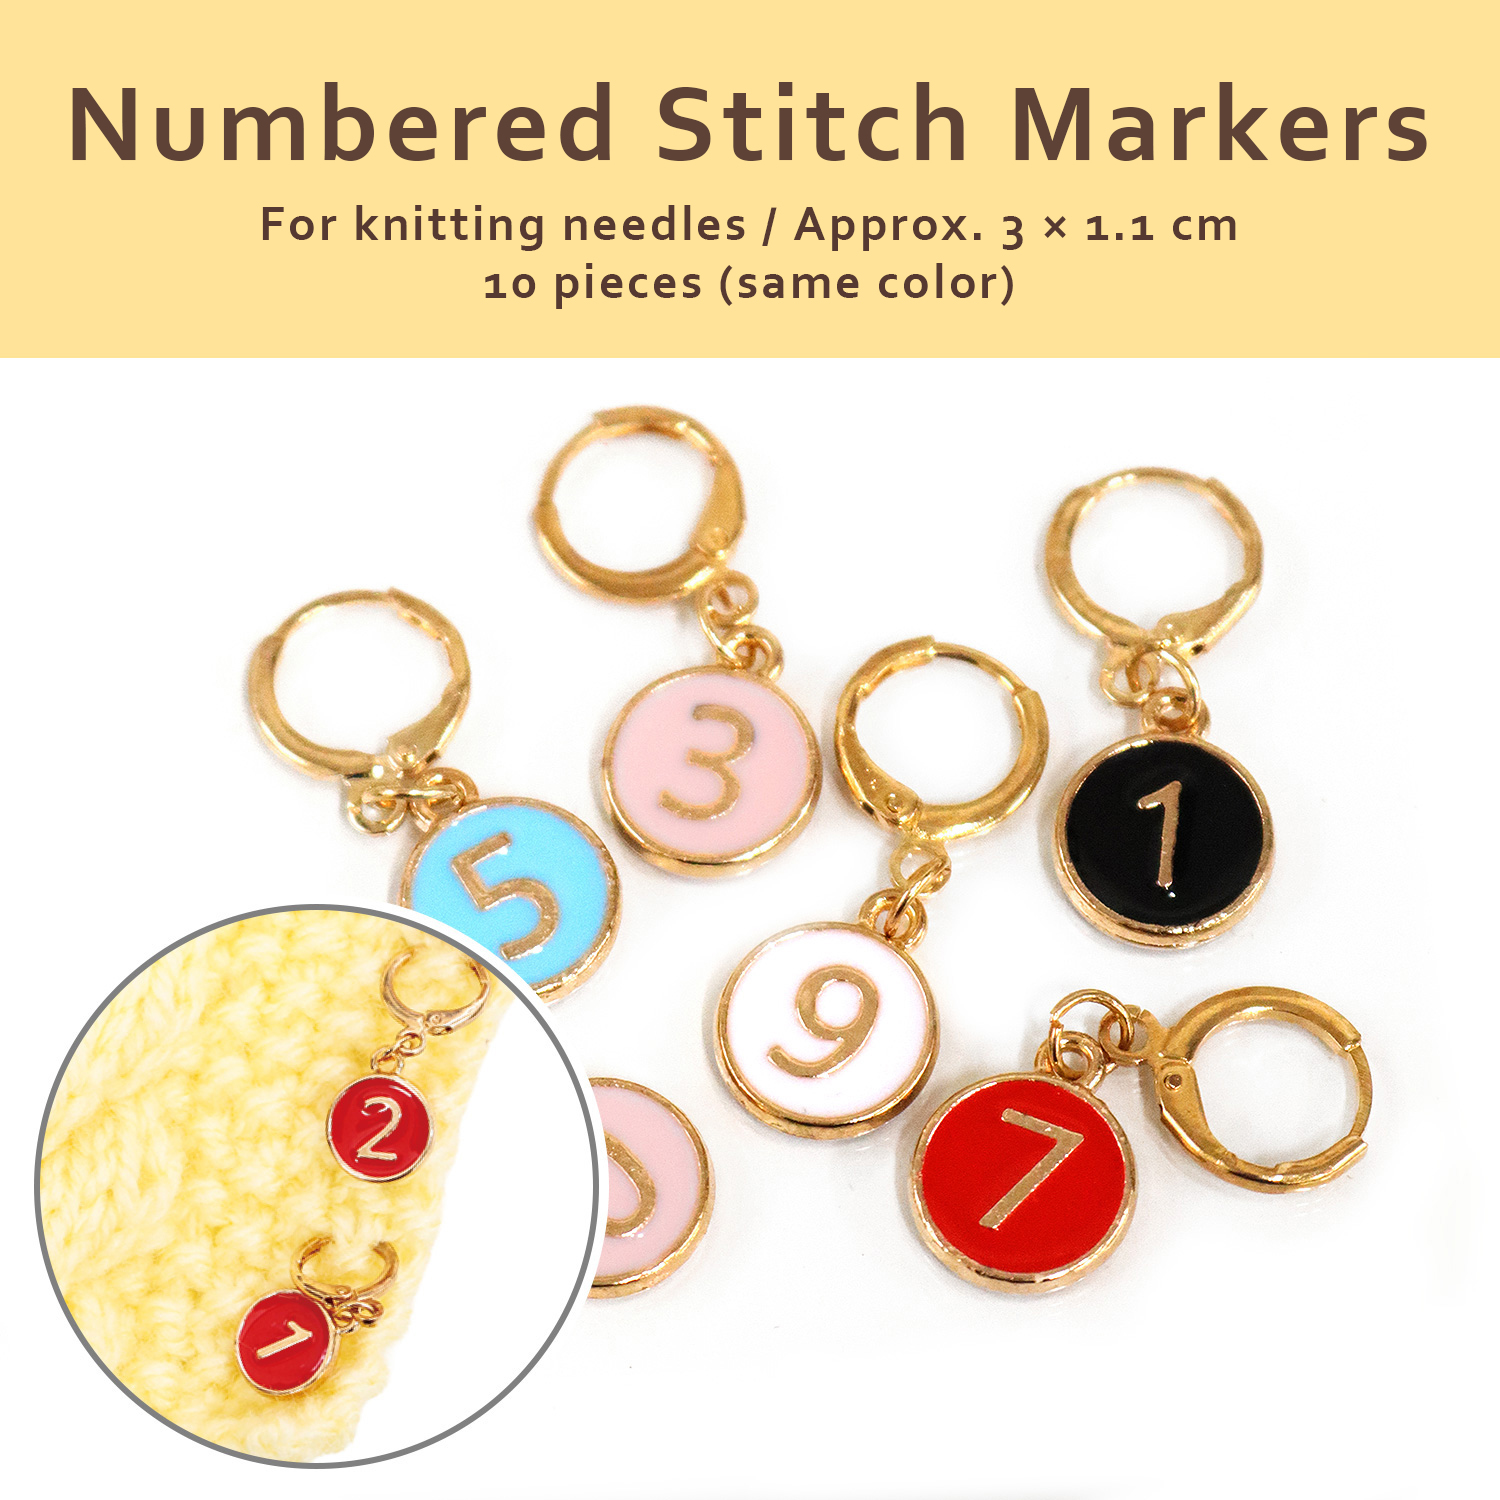
② For Keeping Track of Rows Roughly, Let’s Use Numbered Stitch Markers
When we knit large projects like scarves or sweaters that go over 100 rows, we often think,
“I just want to see—at a glance—about how many rows I’ve finished!”
The bigger the project, the more this becomes a common problem.
Also, for items like sweaters that need to be sewn together at the end, if we lose track of the row where we’re supposed to join the pieces, the seams can end up misaligned.
By using Numbered Stitch Markers, we can see roughly which row we’re on at a glance.
And if we attach a marker to the row that becomes the joining point, we can finish the final assembly smoothly and without stress.
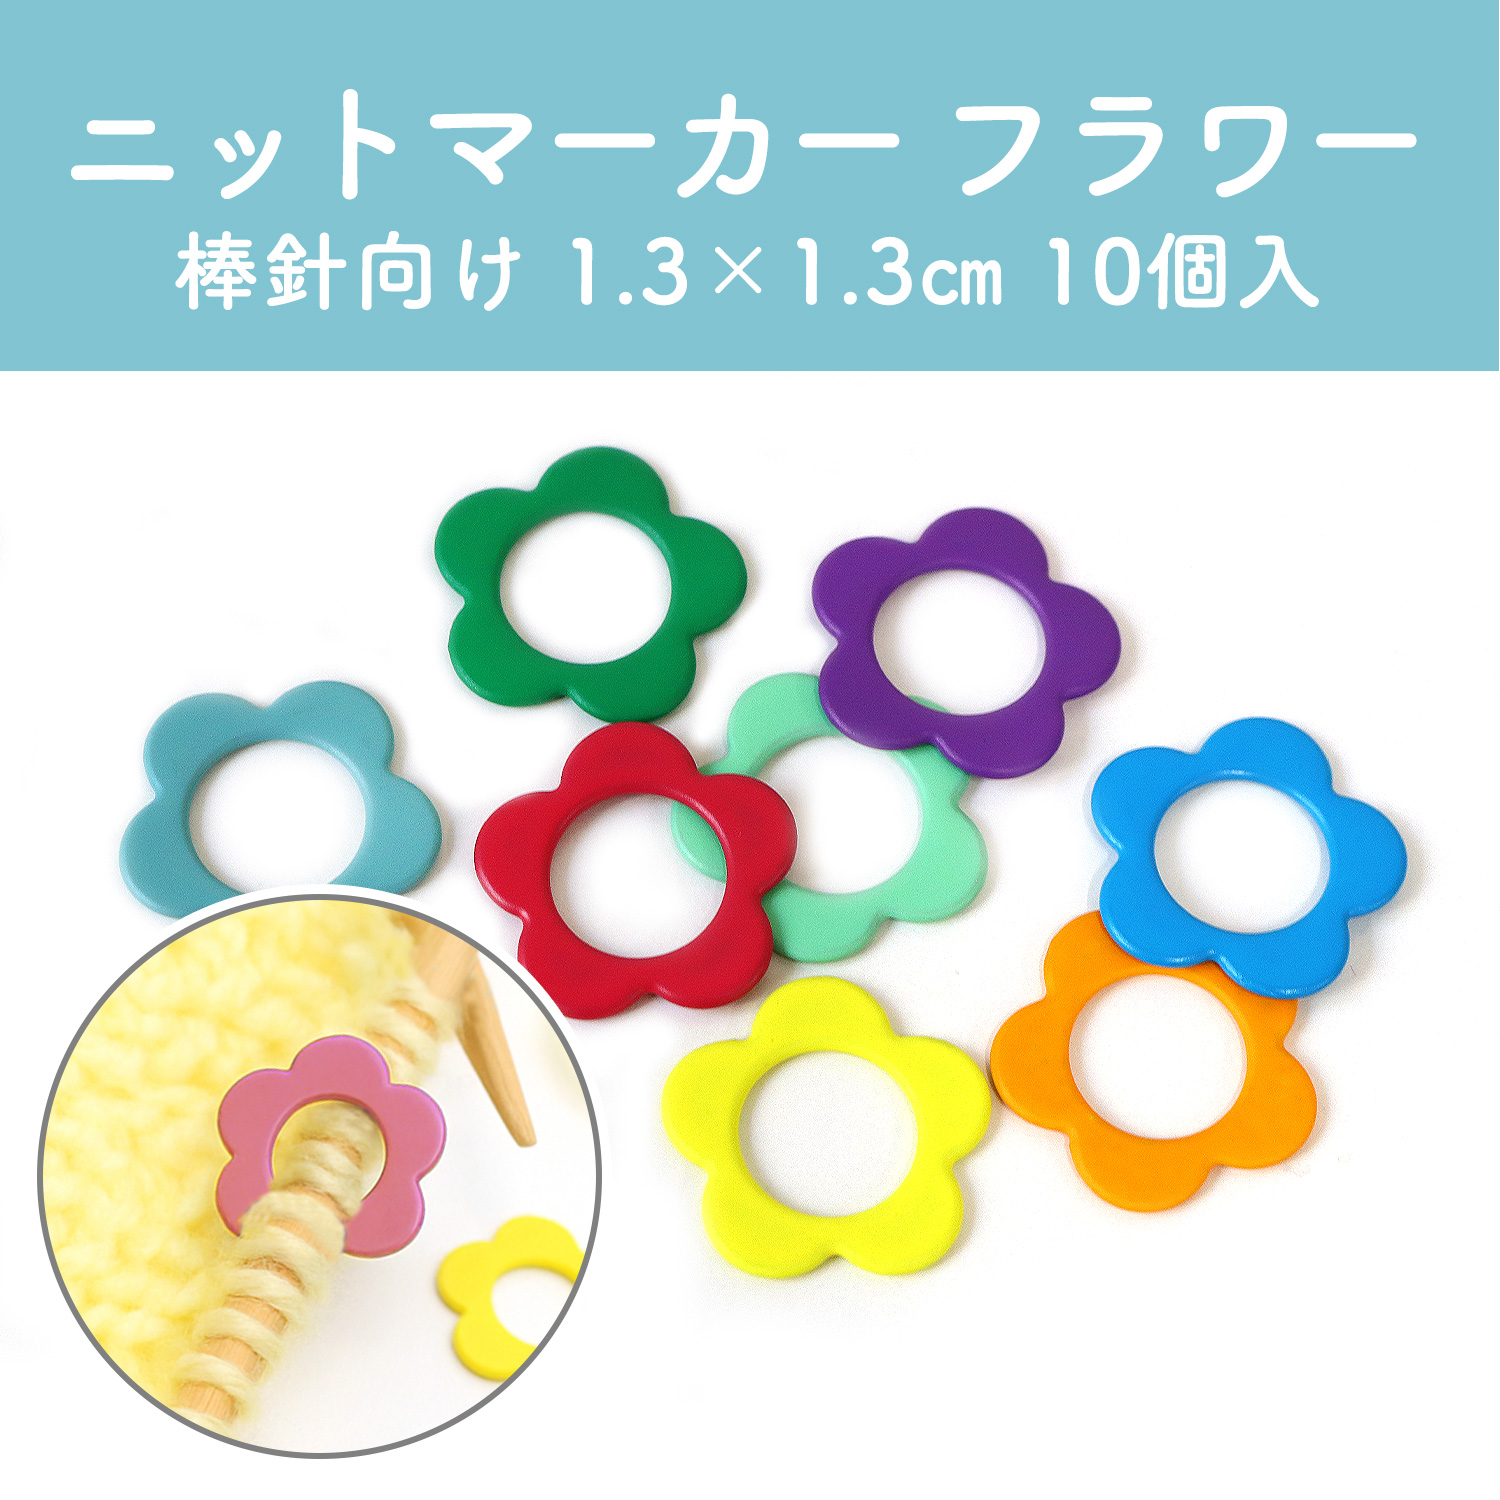
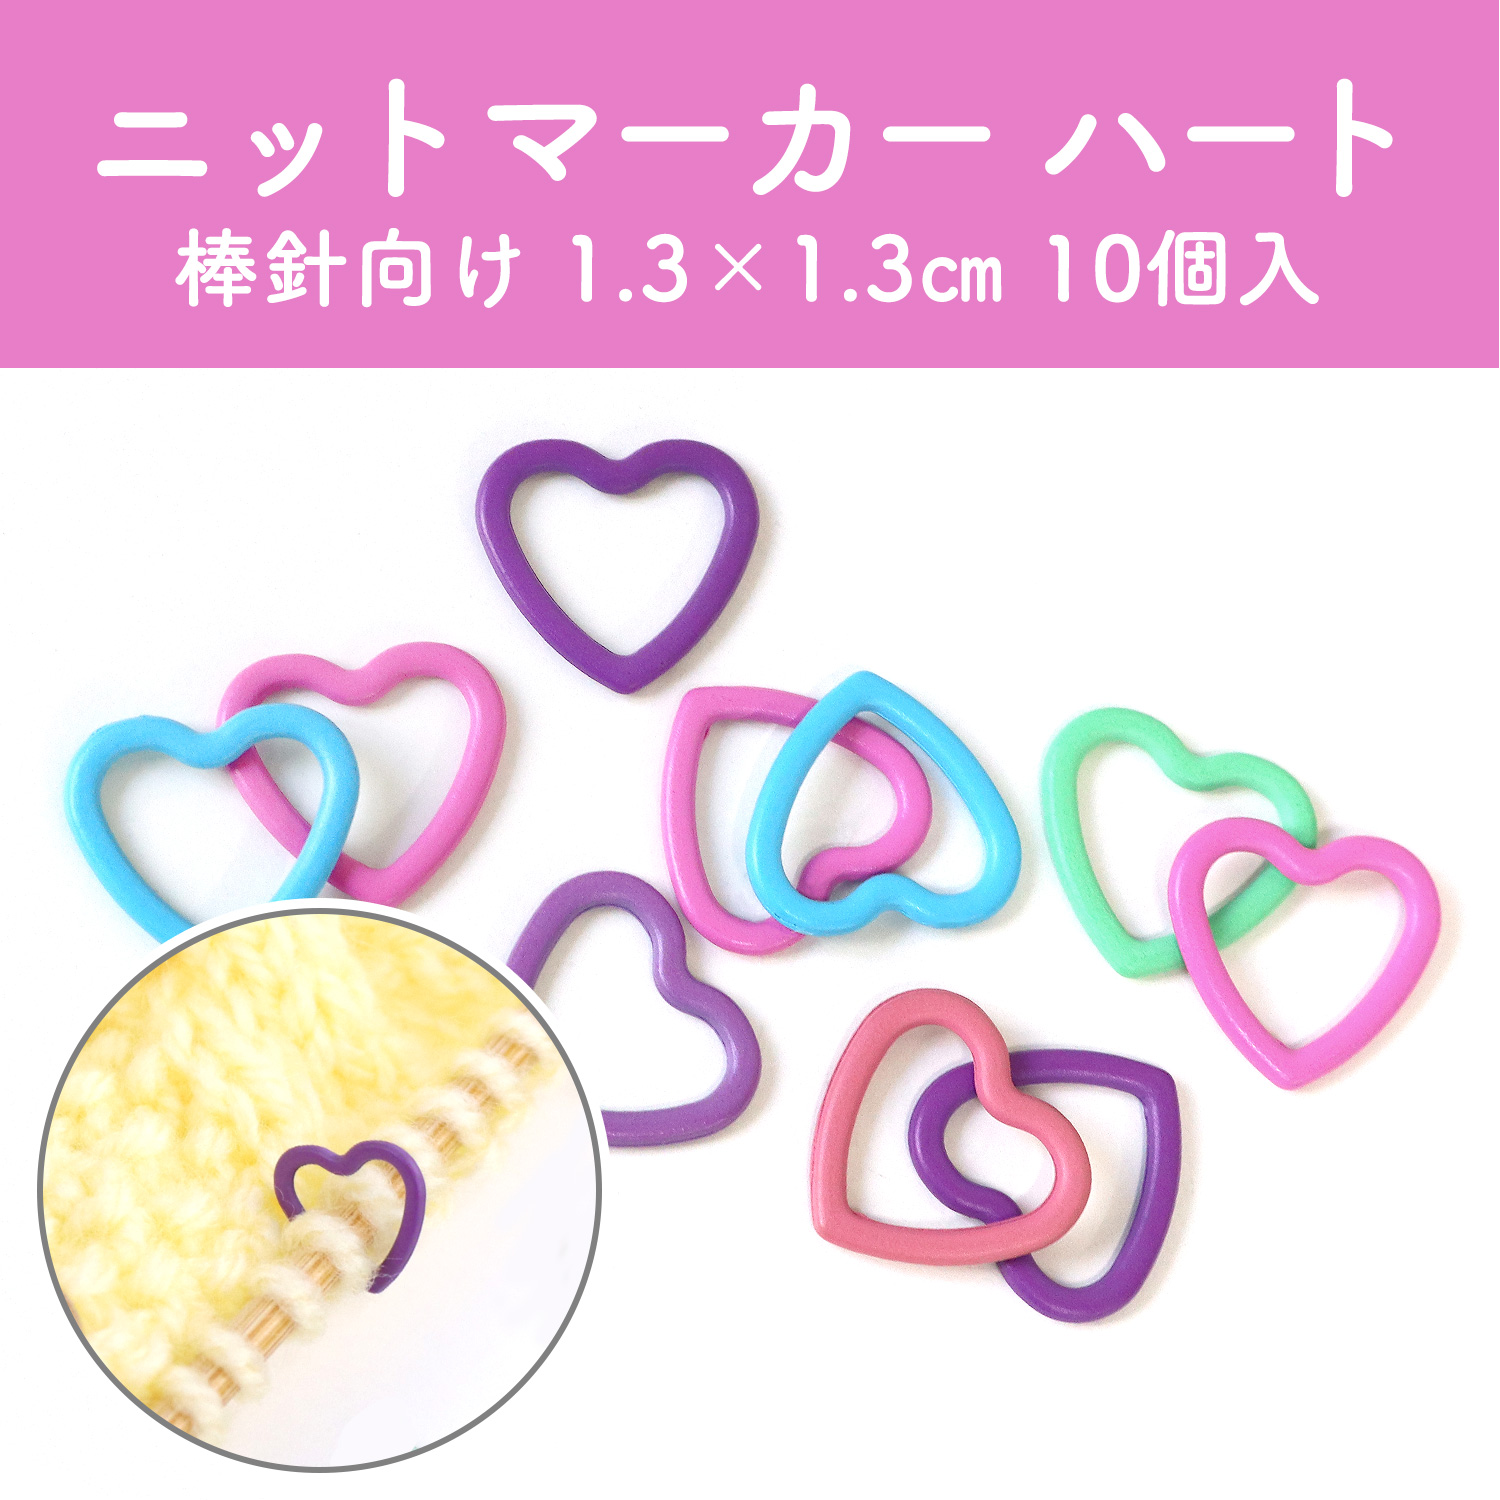
“When I Try Pattern Knitting but Lose Track of Where the Pattern Starts…”
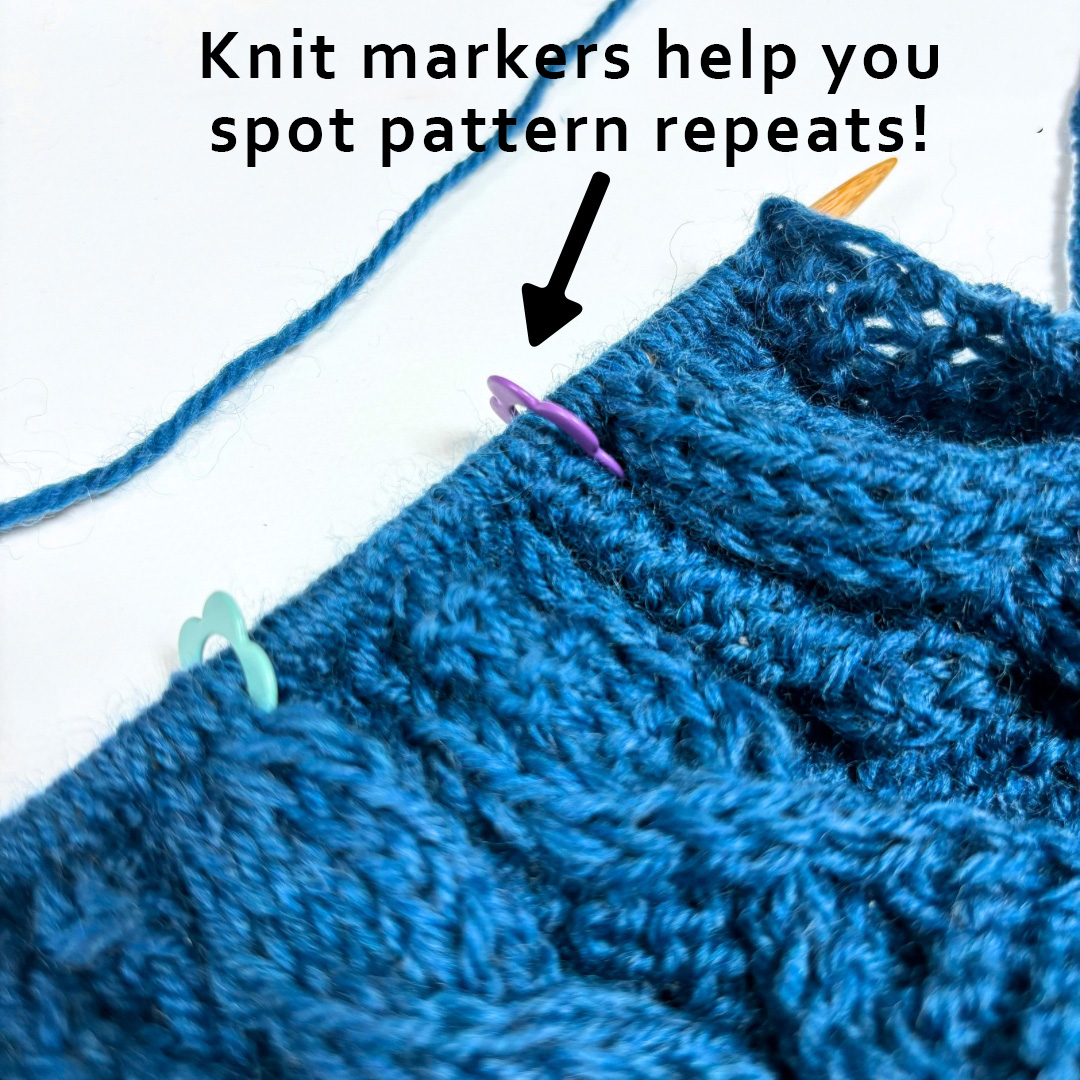
Pattern knitting—like Aran patterns—is one of the best parts of straight-needle knitting.
We may think that as long as we have the chart, we’ll know exactly where the pattern begins…
But sometimes we keep knitting without noticing a mistake, and at the end of the row we suddenly realize we have too many stitches—or not enough! This kind of problem happens more often than we expect.
And since we don’t know where we made the mistake, we end up undoing the entire row and starting over…
But actually, we can avoid this frustration by using knit markers.
If we place a marker at the point where the pattern begins, even if we make a mistake, we can simply unravel back to the marker and fix it.
This helps us knit much more efficiently.
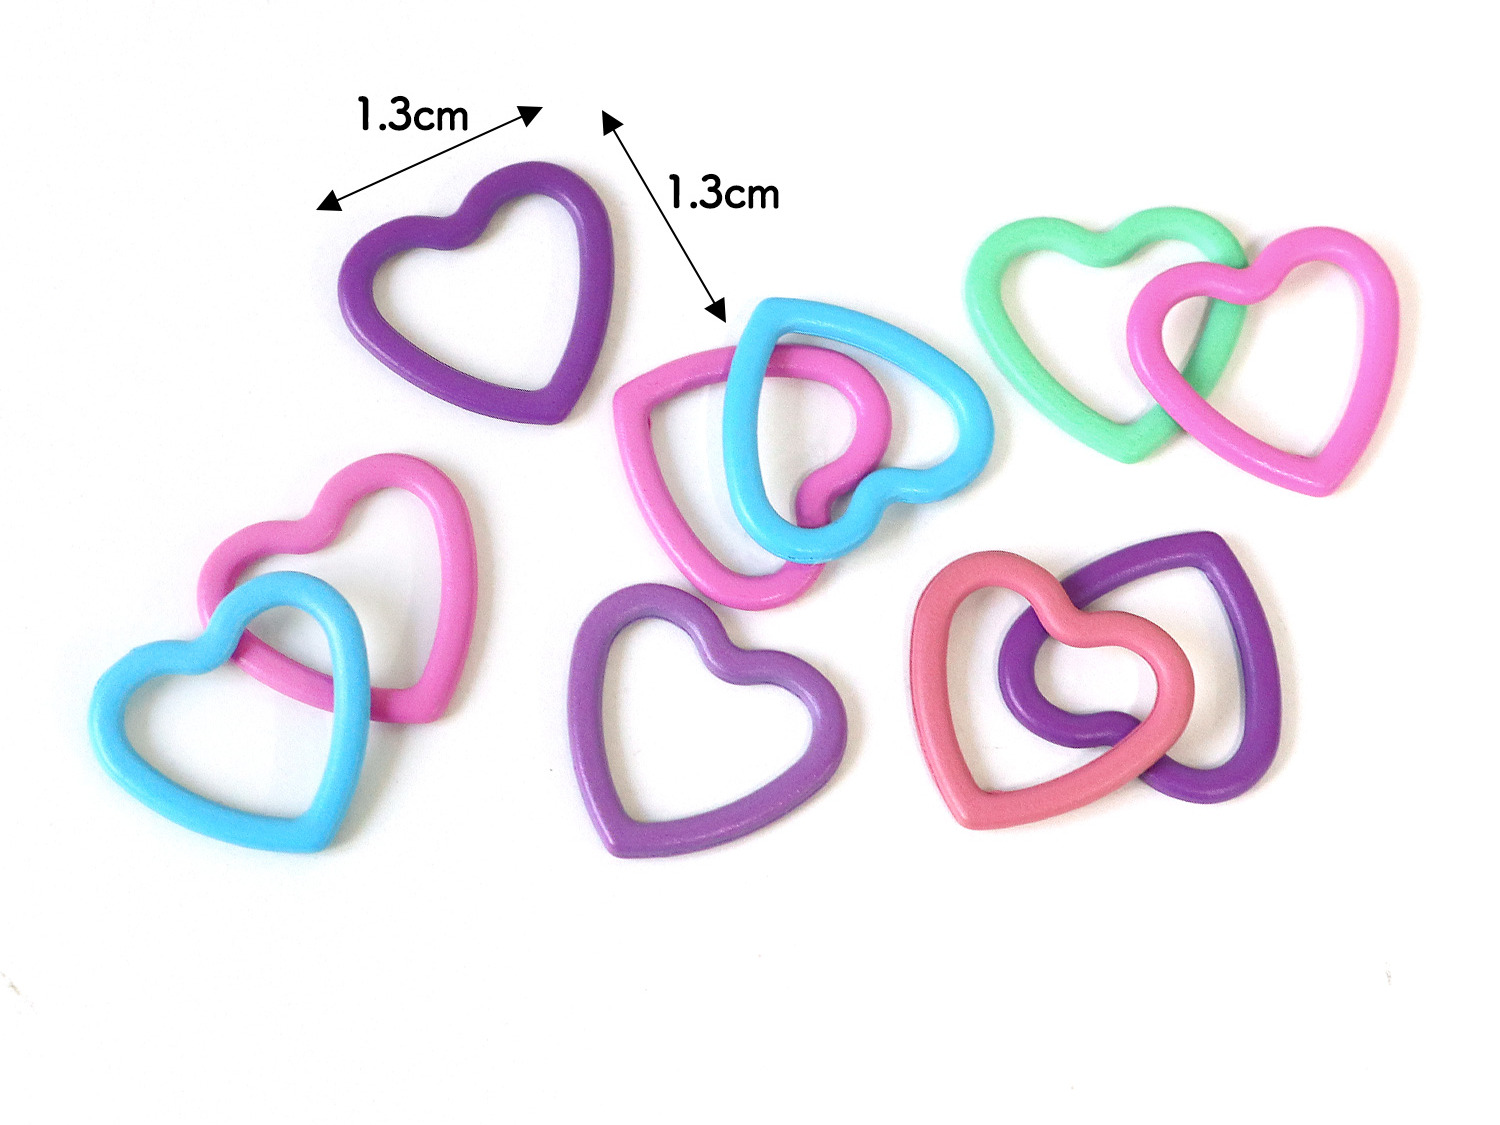
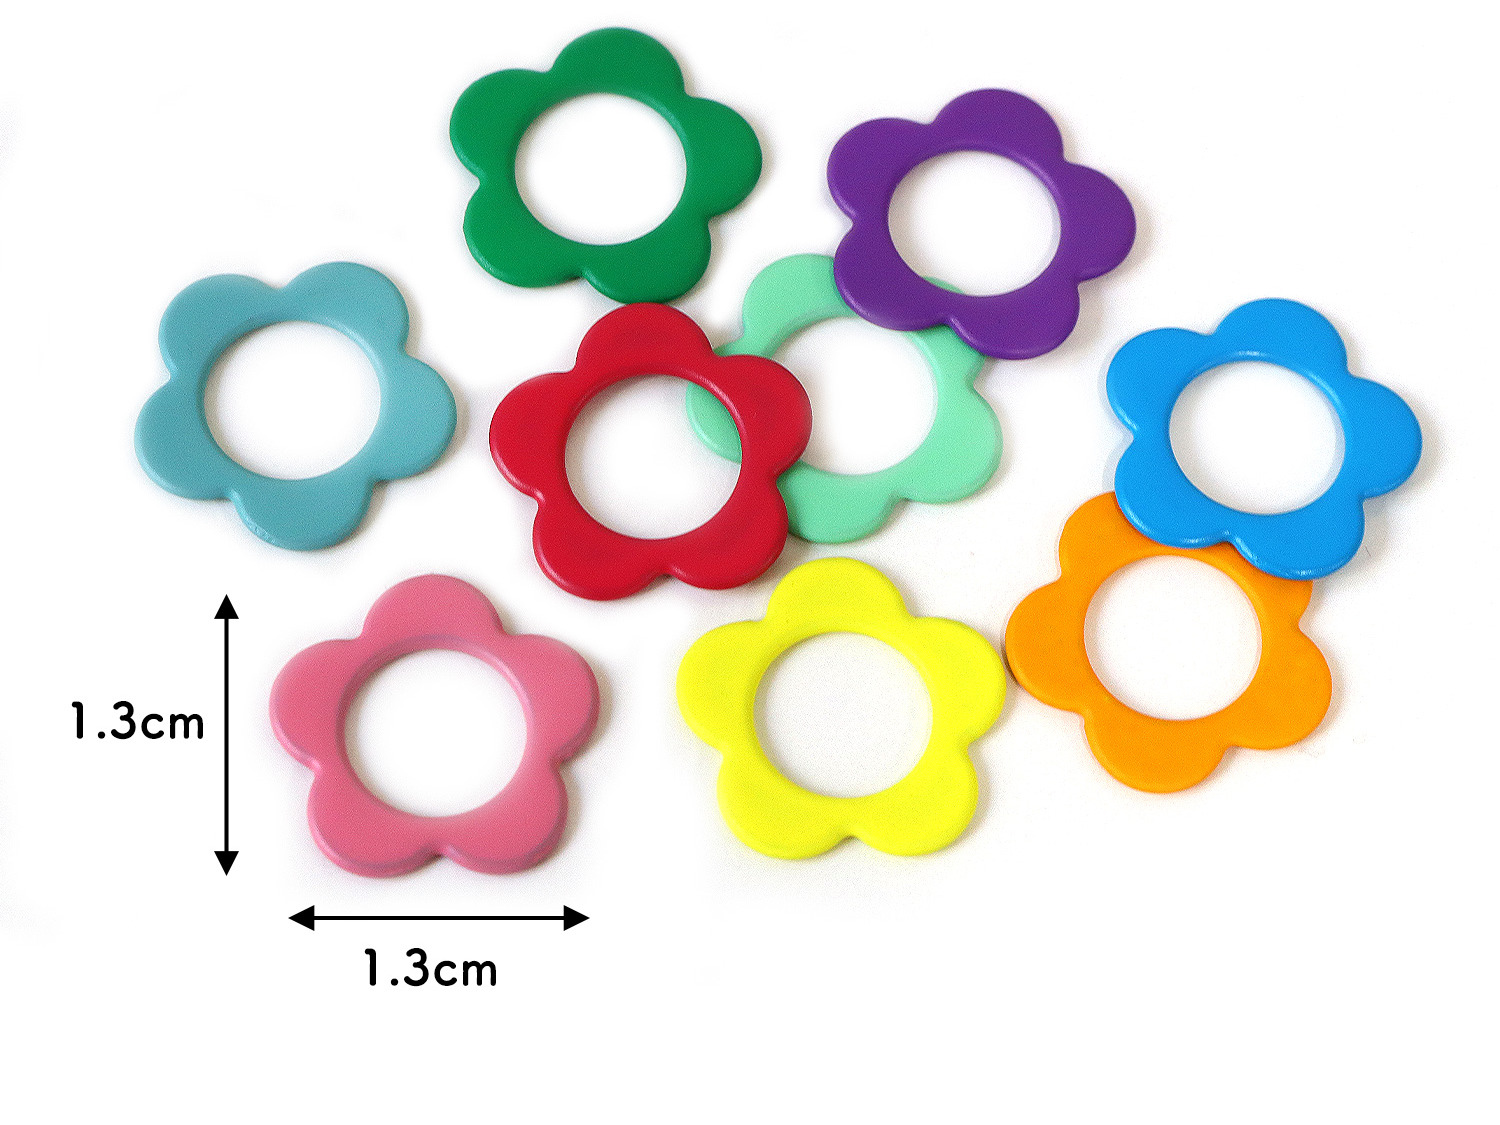
Simple marker shapes are very useful, but cute ones—like hearts or flowers—can make the process more fun and motivating, so they’re also recommended.
Uneven Stitches — “Too Tight, Too Loose, and My Fabric Looks Wobbly…”
Whether you’re crocheting or knitting, one of the most common frustrations is uneven stitches.
You put in all that time, only to find your finished piece looks a bit bumpy or irregular — so disappointing!
Here are a few simple tips that can help your stitches look more even and your fabric turn out smoother.
When Your Stitches Are Too Tight
Here are the most common reasons your stitches end up too tight:
- You’re pulling the yarn too firmly
- Your needles are squeezed too close together
- You’re holding too much tension in your hands
- Your needles are simply too small for your natural gauge
In particular, pulling the yarn too hard or gripping the needles with too much force often creates tight stitches — and once the stitches get tight, you push harder to insert the needle, which makes you tense up even more. It becomes a cycle!
Here are a few tips to break out of it:
- Relax your hands and loosen your grip.
When you concentrate too hard, your posture can collapse and tension builds in your shoulders and hands. If you notice yourself hunching or stiffening up, take a breath and reset your posture so you can work more comfortably.
- Try using a larger needle size.
If adjusting your tension by hand feels difficult, switching to a larger needle can help a lot. It naturally creates slightly bigger stitches, and prevents your finished piece from ending up much smaller than intended.
When Your Stitches Are Too Loose
Common causes of loose stitches include:
- Not adding enough tension to the yarn
- Moving the needles too widely
- Using needles that are too large
- Having inconsistent yarn tension
One mistake beginners often make is moving the needles in big, sweeping motions. This unintentionally pulls extra yarn into each stitch, making your fabric look loose and uneven.
Here are a few tips to help tighten things up:
- Find a steady knitting rhythm.
If you tackle a large project before you’re comfortable, the growing weight of the piece can make your hands move more than they should. Starting with small projects helps train your hands to keep a consistent rhythm.
Once you’ve built that rhythm, you’ll be able to take on bigger projects while maintaining even, tidy stitches.
Wrap-Up
The mistakes and helpful tools introduced in this column all come from the real experiences of staff member Y, who recently took on the challenge of learning needle knitting.
Once you watch the basic knitting tutorials offered by various yarn brands, you’ll find that the techniques themselves are surprisingly simple!
Start with knit stitches and purl stitches—everything else is just a variation of those two.
Don’t let needle knitting intimidate you. Make good use of handy tools and enjoy the process as you dive in!♪
We also share products and special offers on Instagram.
Please follow our Instagram account here!
Chuko Onlineオンラインストアでご注文
Chuko Online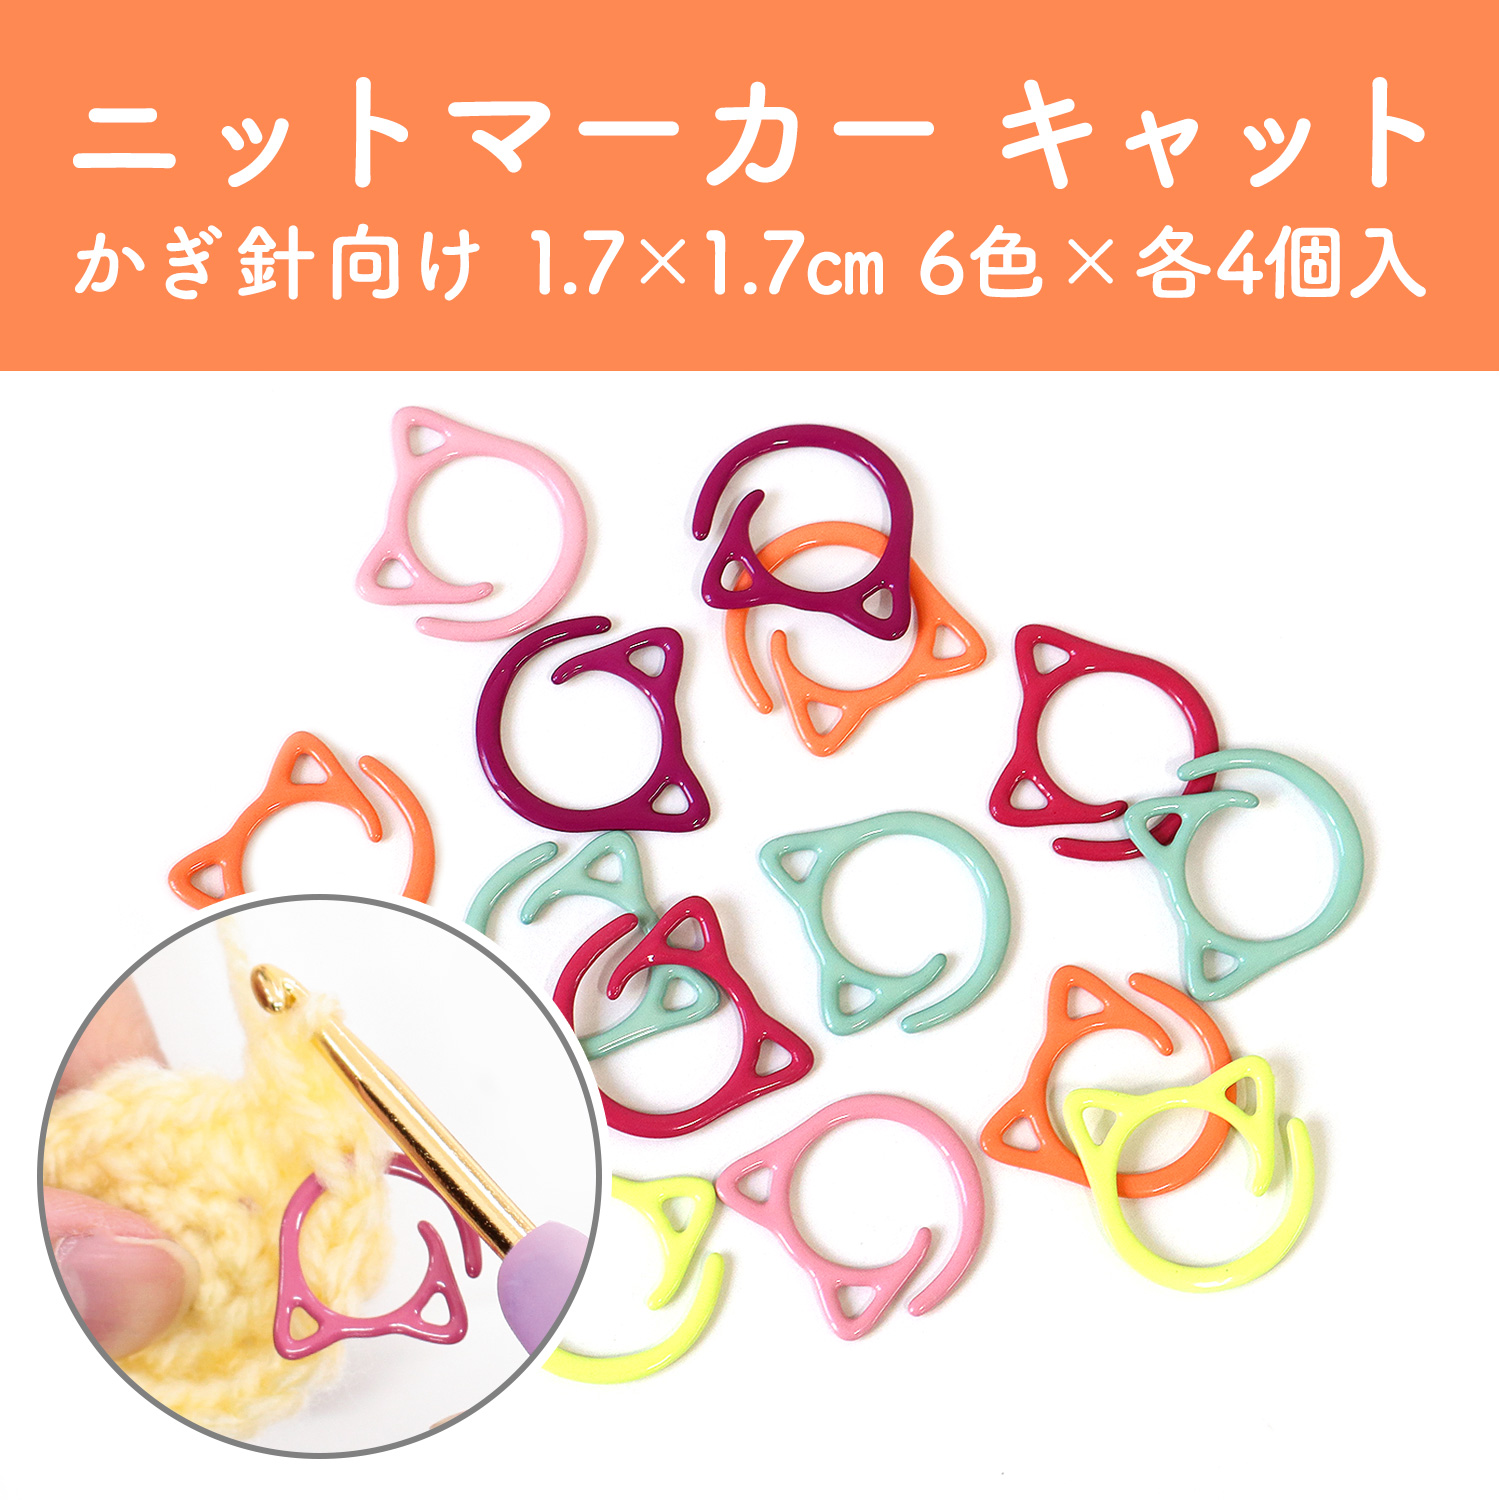

We look forward to your orders and visits!
Our Official Websites
Chuko Online: https://www.nippon-chuko.co.jp/shop
Facebook: https://www.facebook.com/nipponchuko
For product inquiries, please contact us here!
At our Main Building 3F, you’ll find embroidery threads and a full selection of embroidery supplies.
If you’re visiting Osaka, please stop by and say hello!

Chuko Onlineではみなさまに日々の手芸用品の仕入れを便利にしていただけるように、お得なセール情報などを更新しております! ▽Chuko Onlineのサイトはこちらから! https://www.nippon-chuko.co.jp/shop/ みなさまからのご注文をお待ちしております。